

![Beta Disk Interface [Sinclair ZX Spectrum]](https://www.jungsi.de/blog/wp-content/uploads/2015/02/Beta-Disk.jpg)
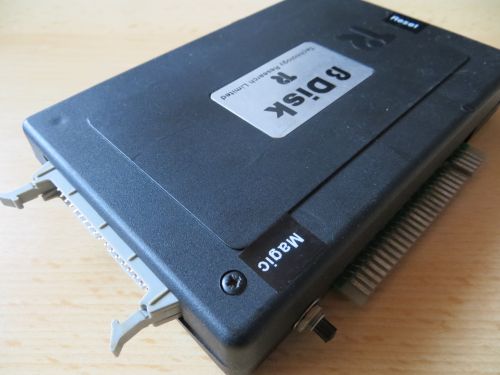
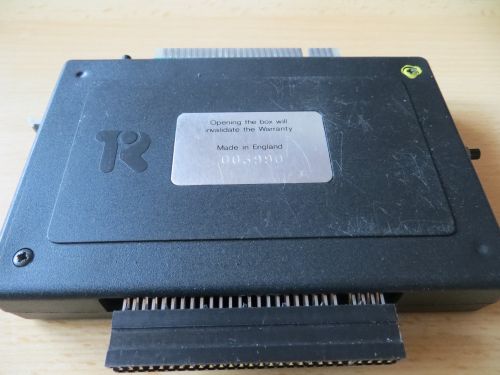
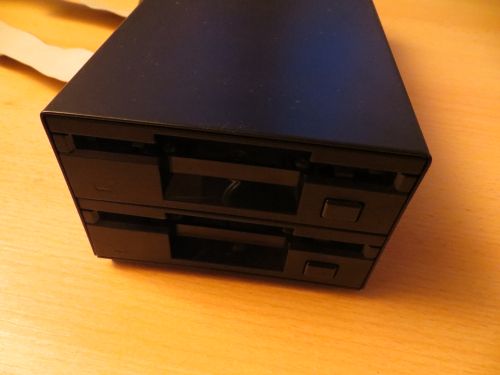
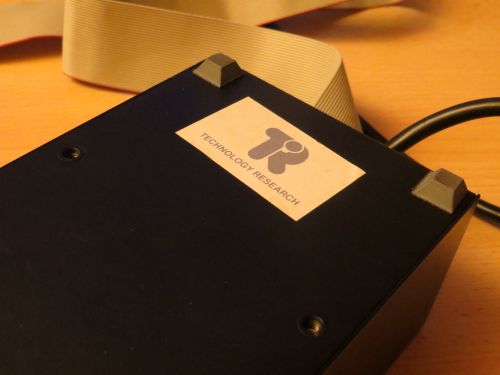
Another disk interface for my Sinclair collection – the rare Beta Disk Interface. The interface was in good condition and came with the manual, the original dual disk drive, and a stack of floppy disks.
History
The Beta Disk Interface is a disk interface for Sinclair ZX Spectrum computers. It was developed by Technology Research Ltd. in England in 1984 and released in 1985. The price at the time was £110 (or £250 with a disk drive).
Beta Disk interfaces were distributed with the TR-DOS operating system (in ROM), which is also attributed to Technology Research. The final firmware version is 5.03 (1986). The interface was based on the WD1793 chip.
A Shugart-compatible connector is located on the right side; this is where the floppy disk drives are connected using a suitable ribbon cable. The interface connector is routed to the rear, allowing other interfaces to be used as well.
It supported single- and double-sided floppy disks with 40 and 80 tracks (double density) and could handle up to four drives.
The interface features a so-called "Magic Button" that allows programs currently in memory to be saved to a floppy disk. There is also a reset button.
The interface was particularly popular in the former Eastern Bloc, where it was "reverse-engineered" and replicated in many variations; later, it was even integrated directly into the hardware of Sinclair clones such as the Pentagon and the Scorpion. Consequently, there is a great deal of software available for the Beta interface, especially from these countries.
TR-DOS files can exist in two formats:
– *.TRD file extension – this is an image of a complete TR-DOS floppy disk with a capacity of 640 KB. Naturally, these disks can contain multiple programs.
– *.SCL file extension – only active file headers and used data sectors are stored.
Originally, the interface was supplied with a utility disk and a manual. The disk contained the following programs (changes were made starting with TR-DOS version 4):
– FORMAT
– TAPECOPY
– BACKUP
– COPY
– SCOPY
With TR-DOS 4, the programs BACKUP, COPY, and SCOPY were consolidated into the FILER program, as the corresponding functions are also available as BASIC commands.
If you have version 4.12 of TR-DOS—like the one on my interface—you should definitely get the manual supplement as well, so you don't get confused about the changes.
It is also nice that the DOS commands for the interface are relatively easy to use:
*”a:” – Default drive A
*”b:” – Default drive B
*”c:” – Default drive C
*”d:” – Default drive A
40 – informs TR-DOS that the default drive has 40 tracks
80 – informs TR-DOS that the default drive has 80 tracks
CAT – displays the contents of the disk
CAT# – prints the contents of the disk
CLOSE# – closes a sequential/random-access file
COPY – copies files from one drive to another
COPY s – copies files in a single-drive system
COPY b – backs up a disk in a single-drive system
ERASE – deletes a file
FORMAT – formats the disk
LIST – displays details of the disk contents
LIST# – prints details of the disk contents
LOAD – loads a program from disk
INPUT# – reads from a sequential/random-access file
MERGE – combines BASIC programs on disk with a program in memory
MOVE – reorganizes and compresses the files on the disk
NEW – changes a filename
OPEN# – opens a stream for a sequential/random-access file
PEEK – reads a file sector from disk into memory
POKE – saves data from memory to a file sector
PRINT# – prints a sequential/random-access file
RETURN – returns to BASIC from TR-DOS
RUN – loads and starts a program from disk
SAVE – saves a program to disk
VERIFY – verifies a program saved on disk
RANDOMIZE USR 15360 – switches from BASIC to TR-DOS
RANDOMIZE USR 15363 – exits TR-DOS commands Access BASIC
Tips and Notes
It is important to point out the difference regarding the Beta 128: The Beta 128 was the official version for the ZX Spectrum 128 released in 1987—due to different access addresses, it was not directly compatible with the original Beta Disk Interface. In contrast, the original Beta Disk Interface works only with 48K models (unless the 128K's ROM is replaced with that of the 48K).
My version of the interface features TR-DOS version 4.12 along with the Vision 1.0 graphical interface; the following can happen upon power-up:
Power on without disk: Vision 1.0 starts
Power on with disk but without “Boot”: Vision 1.0 starts
Power on with disk and Boot: Boot starts
Magic Button
Pressing the Magic Button pauses the running program and writes the entire contents of memory to a floppy disk. This image can later be reloaded from the disk, allowing the program to resume from the point where it was interrupted. For instance, you could load a game from cassette and—once loading is complete—save it directly to disk without altering a single byte of memory in a way that would make continuing the game impossible. This made it possible to copy any game running on a Spectrum—a nightmare scenario for software publishers had the disk system become more widespread. The system requires only a 256-byte buffer, utilizing the Spectrum's printer buffer. Before using it, the system saves the buffer's contents to the disk's system track; once the operation is complete, the original printer buffer is reloaded from the disk. Memory contents are lost only if the disk is write-protected.
Note: The “snapshot” is always saved in tracks 0-12 and is named “ ” and the file type is CODE. Therefore, after creating the snapshot, you must copy it to another disk or rename it, otherwise it will be overwritten by the next snapshot. (You can assign a new file name with the command “NEW”).
Another requirement is a single-sided diskette (formatted on one side) - this must be formatted accordingly beforehand.
Format Single Sided: FORMAT “$DISKNAME”
The saved file can then be loaded with GO TO “name” CODE.
Some games use a non-standard keyboard routine, so they may not work properly after loading. This can be avoided by prefixing the file name with a “$”. E.g.: Rename with: NEW “$TEST”,” “CODE – Load with: GO TO “$TEST”CODE
VISION
As previously mentioned, Vision is a graphical interface from the German software company Individual Software, released in 1987. It features a user interface that almost any child today would recognize—with icons for disk drives, the Recycle Bin, and the printer. You can view the contents of a floppy disk and copy or delete files (by dragging and dropping them into the trash can). The only difference is the lack of a mouse; this is replaced by the keys Q, A, O, and P (controlling the direction of the "mouse pointer") and the SPACE bar (acting as the left "mouse button"). If a joystick interface is connected, you can also use a Sinclair joystick. A single "click" selects an icon, while a "double-click" launches an action. I use my Angry Space Invaders joystick interface in Sinclair mode (DIP switch 2 set to OFF) for this. Of course, you can also launch programs—such as games—directly from the floppy disk. I always find it amazing what was achievable back then given the limited capabilities of Sinclair computers 🙂
You can launch Vision from TR-DOS by pressing . + Enter!
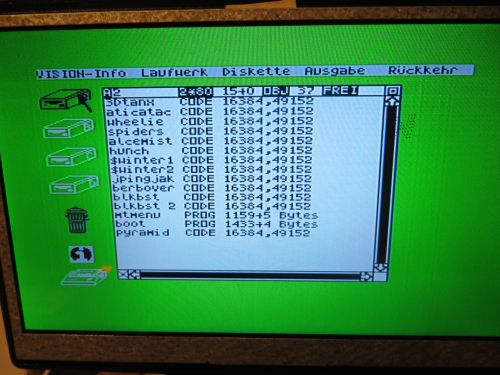
Since I had received a large stack of floppy disks, I tested whether backing up and restoring with SAMdisk would work. That works without any problems, too!
The Multiface One should also work, but I haven't tested it yet.
I also tested the Beta 48 (the colloquial name for the original version compatible only with 48K machines, to distinguish it from the Beta 128) with my HxC emulator—it works just as well. 🙂
When preparing the SD card for the HxC, you should set the interface mode to “Auto” or select “Generic Shugart.” Then, simply write the config file to the SD card and populate it with TRD images.
However, anyone wanting to experiment with TR-DOS today doesn’t necessarily have to rely on original hardware: modern FPGA recreations—such as the ZX Spectrum Next, the ZX Uno, or the MiSTer core—come with built-in TR-DOS support.
Here, I have once again created a "one-sheet manual" containing the most important TR-DOS commands:
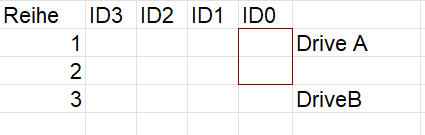
Beta-48-OneSheetManual.pdf 102×Photo of the jumper settings!
http://zxdemo.org/
https://vtrd.in/
https://worldofspectrum.net/documentation/
![Invasion Of The Zombie Monsters [Sinclair ZX Spectrum]](https://www.jungsi.de/blog/wp-content/uploads/Invasion-Of-The-Zombie-Monsters-Ladescreen.webp)
![Little Dragon 2 [Sinclair ZX Spectrum]](https://www.jungsi.de/blog/wp-content/uploads/little-dragon-2-ladescreen.jpg)
![Rival Gangs [Sinclair ZX Spectrum]](https://www.jungsi.de/blog/wp-content/uploads/Rival-Gangs-Screen-2.jpg)
Danke Dir, Gerhard. Ich habe das OSM auch in die 8-Bit Wiki gestellt.
Hi Jungsi,
kannst du in dein OneSheetManual bitte noch
das Beispiel mit den Wildcards einfügen ?
Also z.B.: COPY „B:*“, „A:*“
Irgendwie vermisse ich das immer in meiner Hirnschale,
wenn ich mal wieder ein wenig mit dem Beta oder ZX Evo / TR-DOS rumspiele…
Danke!
Hallo Luzie – ist beim COPY Befehl nun mit dabei 🙂
Vielen Dank nochmals !
Hallo, ich habe noch ein paar Bilder und Hardware diesbezüglich.
Ein DIY 3x 800 KB Floppy Tower und eine DIY ZX Spectrum Riser Card mit 3 Steckkarten für Floppy/Centronics Printer/BDISK 4.81 und Joystick Controller.
Im ZX Spectrum oder auf der Riser Card ? war noch das KuB 64K custom ROM mit RAM Hex Editor. Ist ja doch schon fast 40 Jahre her…
Auf jeden Fall kann ich mich gut an Magic Copy erinnern. 13 Images passten auf eine Floppy, das älteste wurde dann überschrieben.
Suspend to Disk und quasi Time Machine „Backup“ anno 1985
Ich dachte, es hätte CP/M oder speziell CP/A. Kann aber auch TR-DOS gewesen sein. Auf jeden Fall sehr einfach zu benutzen und das ganze OS war auf einem ROM, praktisch keine Startzeit nötig. Auch die Floppies waren wahnsinnig schnell, Programme m.E. alle in nur 1-3 s geladen.
Bei Interesse kann ich die Bilder davon mal irgendwo uploaden.
Hallo,
das hört sich ja interessant an, da hast Du ja mit dem Beta-Disk wesentlich mehr gemacht als ich!
Die Bilder würden mich sehr interessieren. Wenn Du willst, könntest Du Bilder zippen und hier hochladen: https://wetransfer.com/
Meine E-Mail dafür: retro@jungsi.de
Vielen Dank!