![ZX Touch [Elmar Electronic]](https://www.jungsi.de/blog/wp-content/uploads/ZX-Touch-Oberseite.jpg)
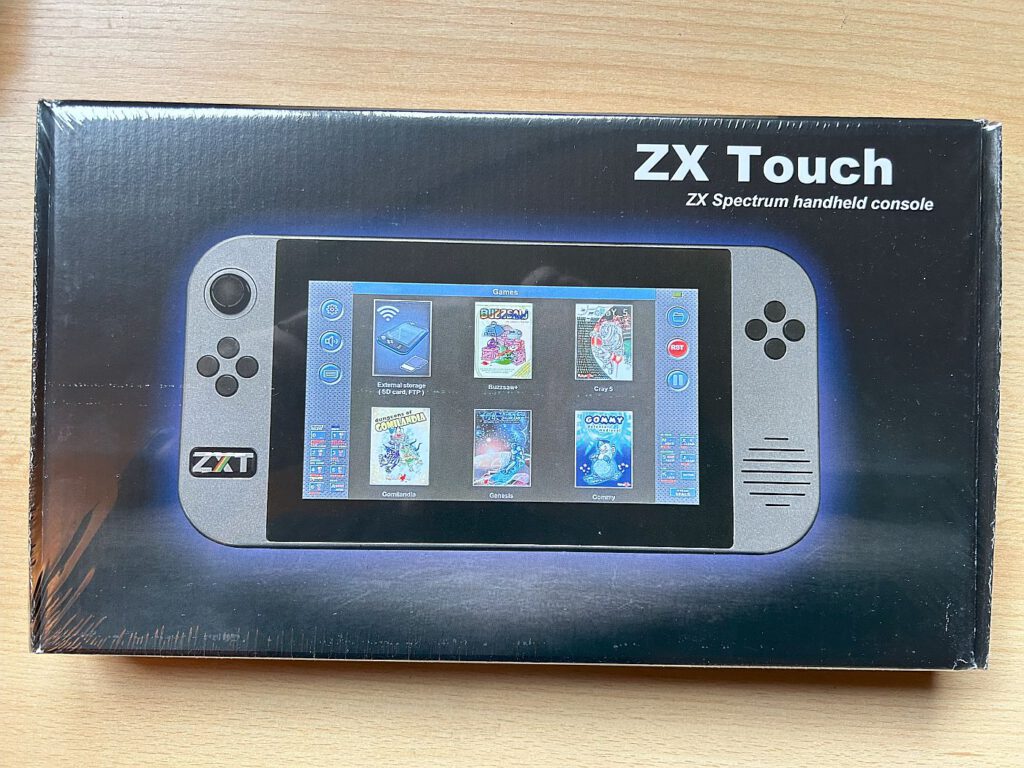
There are announcements that come to nothing, and there are surprises that appear out of the blue – like the ZX Touch. As an old-school Sinclair fan, I often buy new hardware without giving it much thought. In this case, however, I was a bit hesitant, as the device has been on the market since December 2023. Ultimately, I was won over by the positive reviews and the current extras (as of November 2024): an acrylic display stand and a carry case.
The handheld is manufactured by Elmar Electronics, the company that previously developed the ZX-VGA-JOY (a VGA adapter for the Sinclair ZX Spectrum). Distribution is once again being handled by Sintech in Germany.
As early as 2018, there was an attempt to launch a handheld console (Vega+) featuring Sinclair games. More than £500,000 was raised from 4,700 backers via the crowdfunding platform Indiegogo. However, as many promises were not kept and no finished product was released, the campaign was eventually cancelled and the backers were reimbursed – where possible.
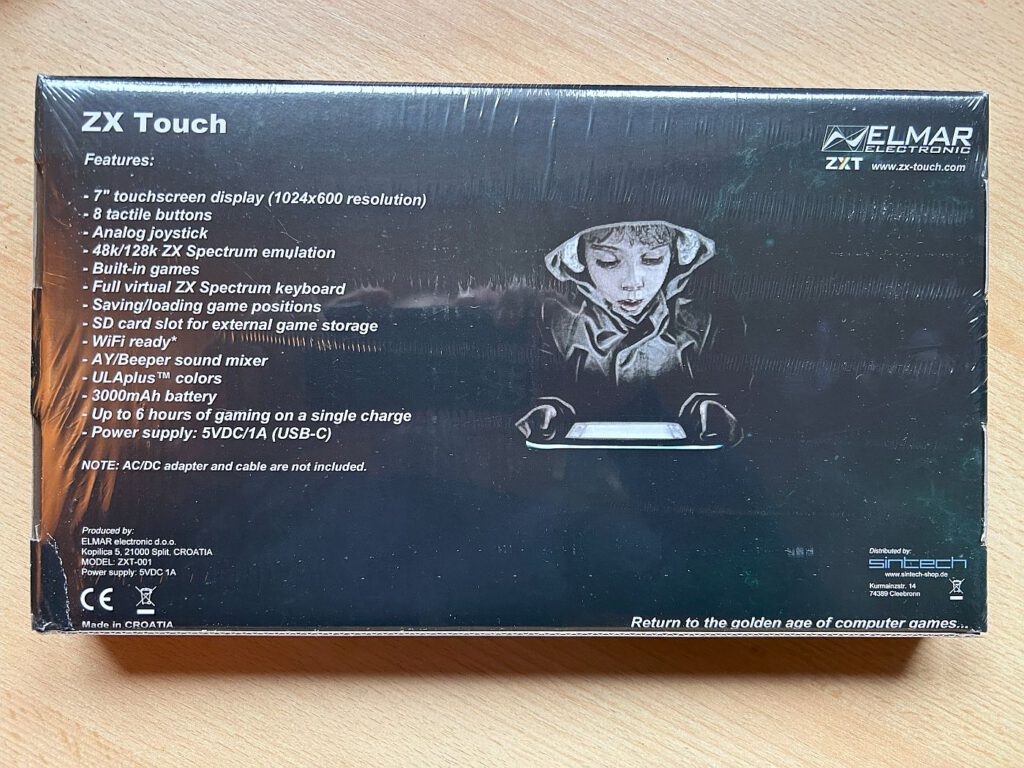
Beim ZX Touch sieht das jedoch ganz anders aus: Es wurde nichts angekündigt und kein Geld vorab kassiert – damit blieb der Druck auf die Eintwicklung aus. Das Gerät wurde vollständig vorfinanziert, ist physisch verfügbar und kostet 238 €.
Der Handheld ist mit einem ARM Cortex-MZ 480 MHz Prozessor ausgestattet und verfügt über einen 7-Zoll-IPS-Touchscreen mit einer Auflösung von 1024 × 600 Pixeln. Zum Lieferumfang gehören ein Adapter von USB-C auf USB-A sowie ein USB-C-Kabel.
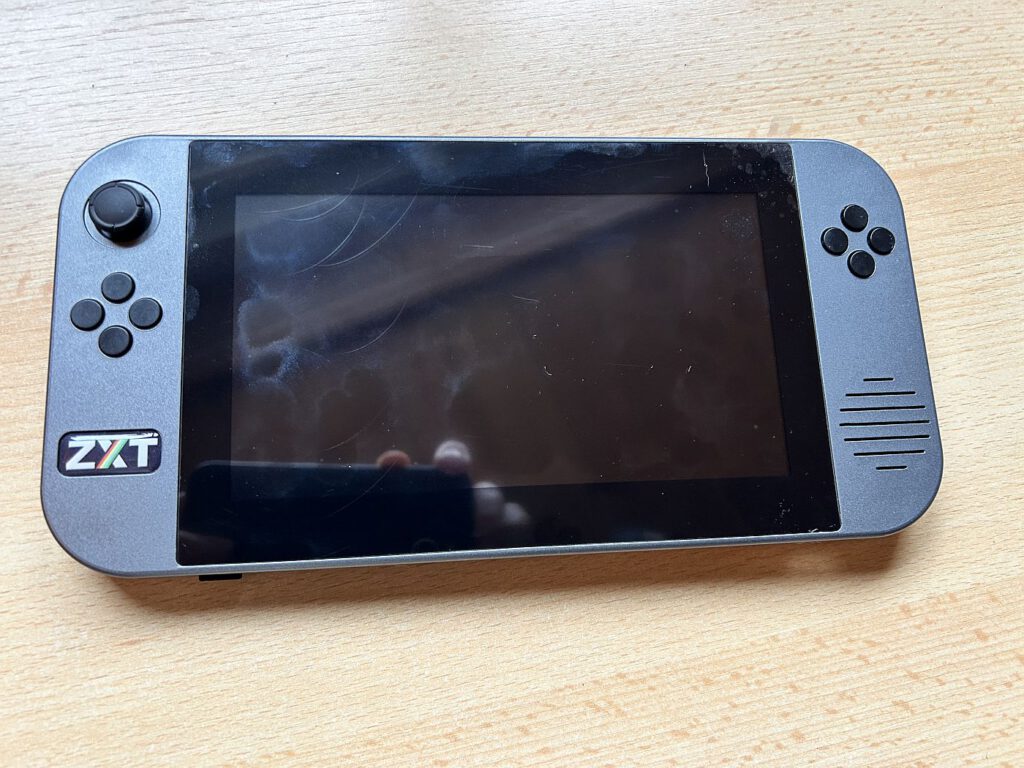
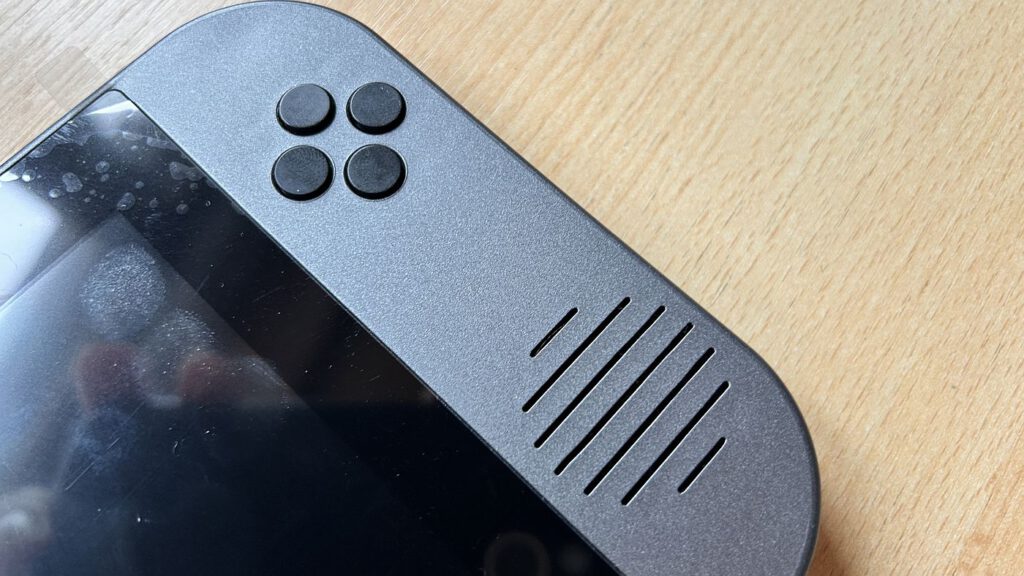
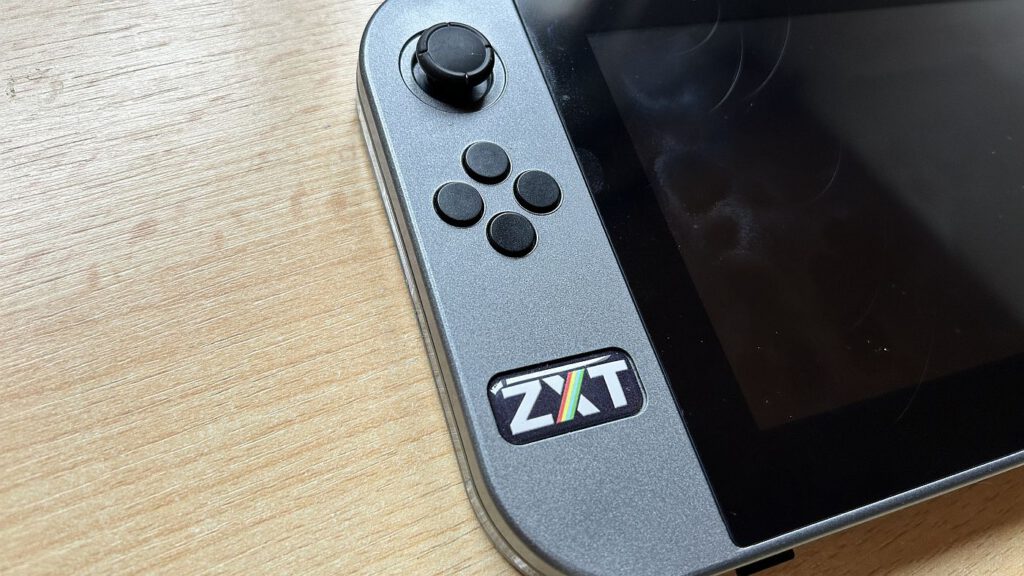
When unboxing the ZX Touch, its size immediately catches the eye; it is roughly the same size as a Nintendo Switch. The large touchscreen (7-inch IPS, 1024 × 600 pixels) is set within a dark grey casing. There are eight buttons on either side of the display, and an analogue joystick on the left-hand side.
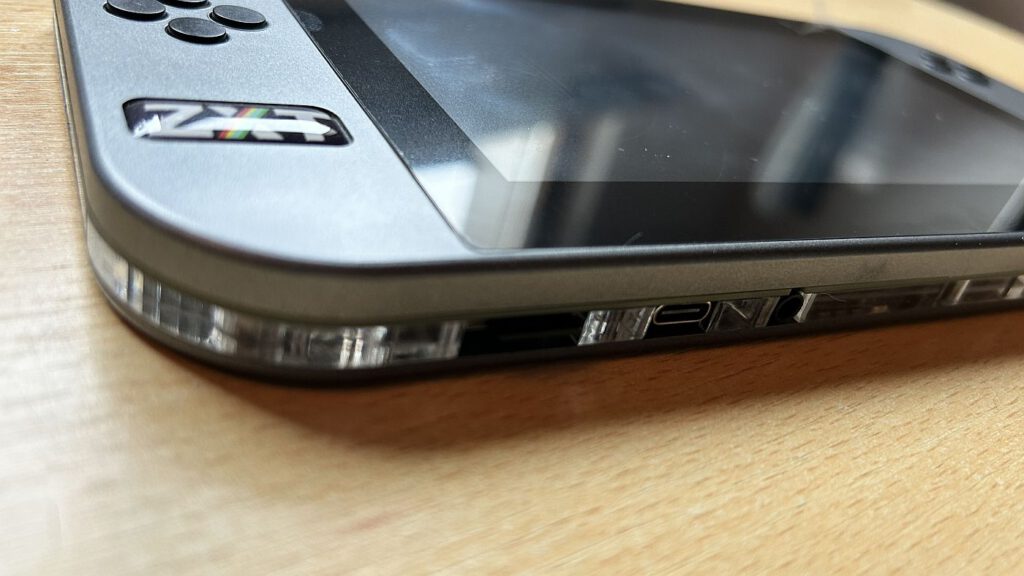
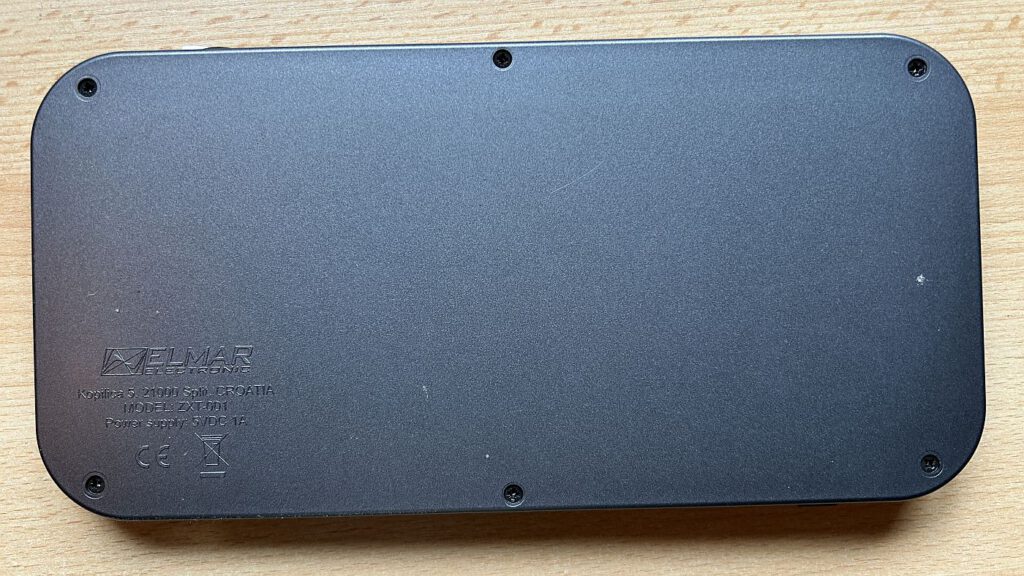
The power button is located on the top right-hand side of the device. On the underside, you’ll find a USB-C port, a microSD slot and a 3.5 mm jack for headphones or speakers.
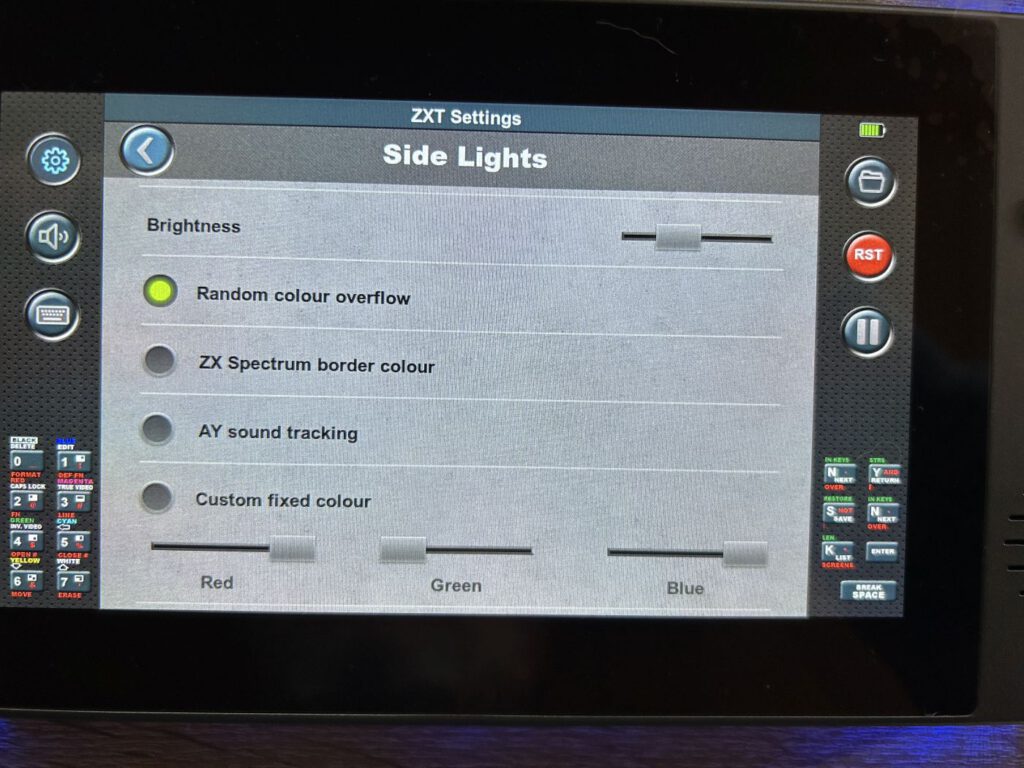
The top and bottom of the housing are joined by an acrylic layer containing integrated LEDs. These light up when the device is in use, creating a distinctive visual effect.
Experiences (Firmware 1.11)
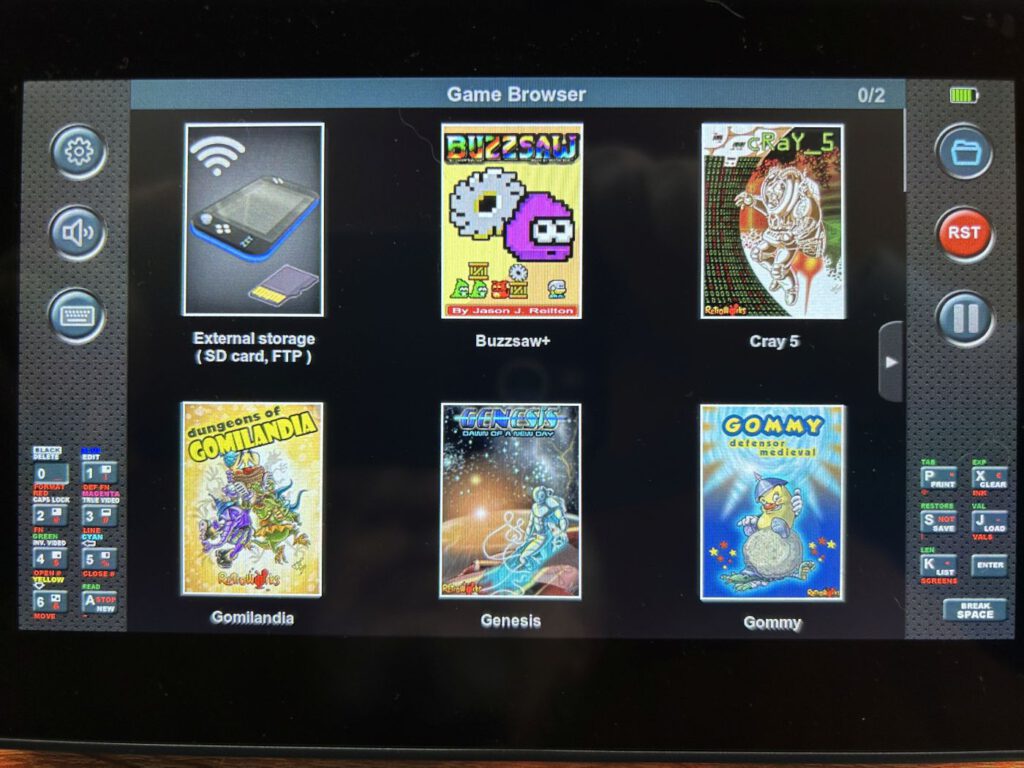
After switching on, it takes barely a second for the standard dashboard to launch. Navigation is controlled via the joystick, whilst games can be launched via the touchscreen with no waiting time. I’ll explain exactly how to add games to the dashboard later.
I would appreciate it if the entire navigation system – including starting a game – could be controlled using the joystick and buttons. That way, I wouldn’t have to touch the touchscreen every time I want to start a game.
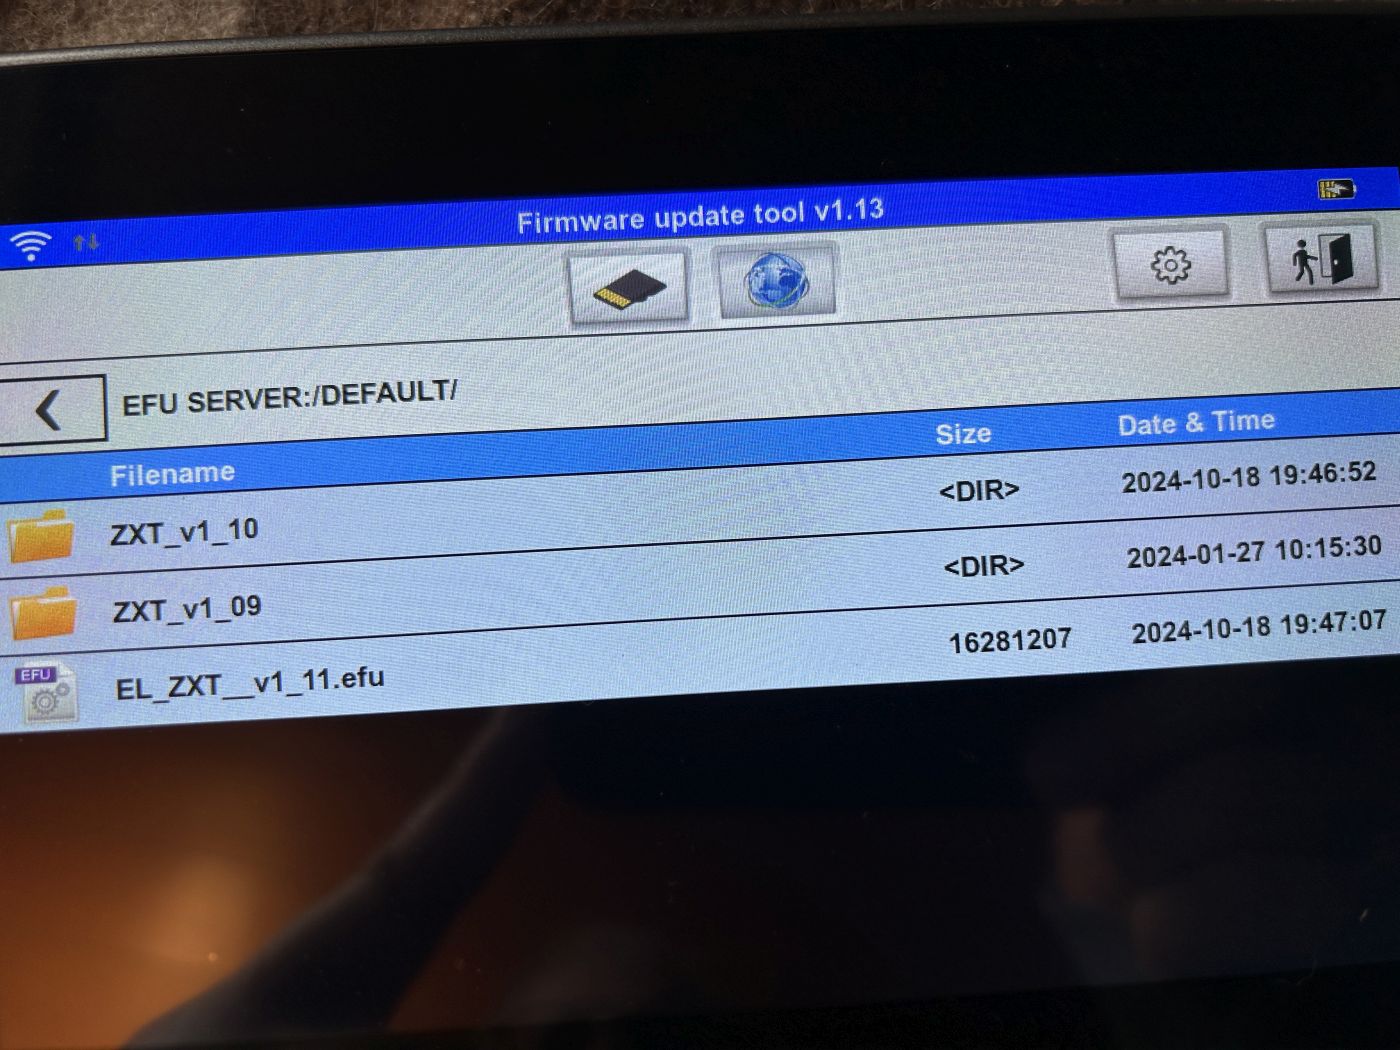
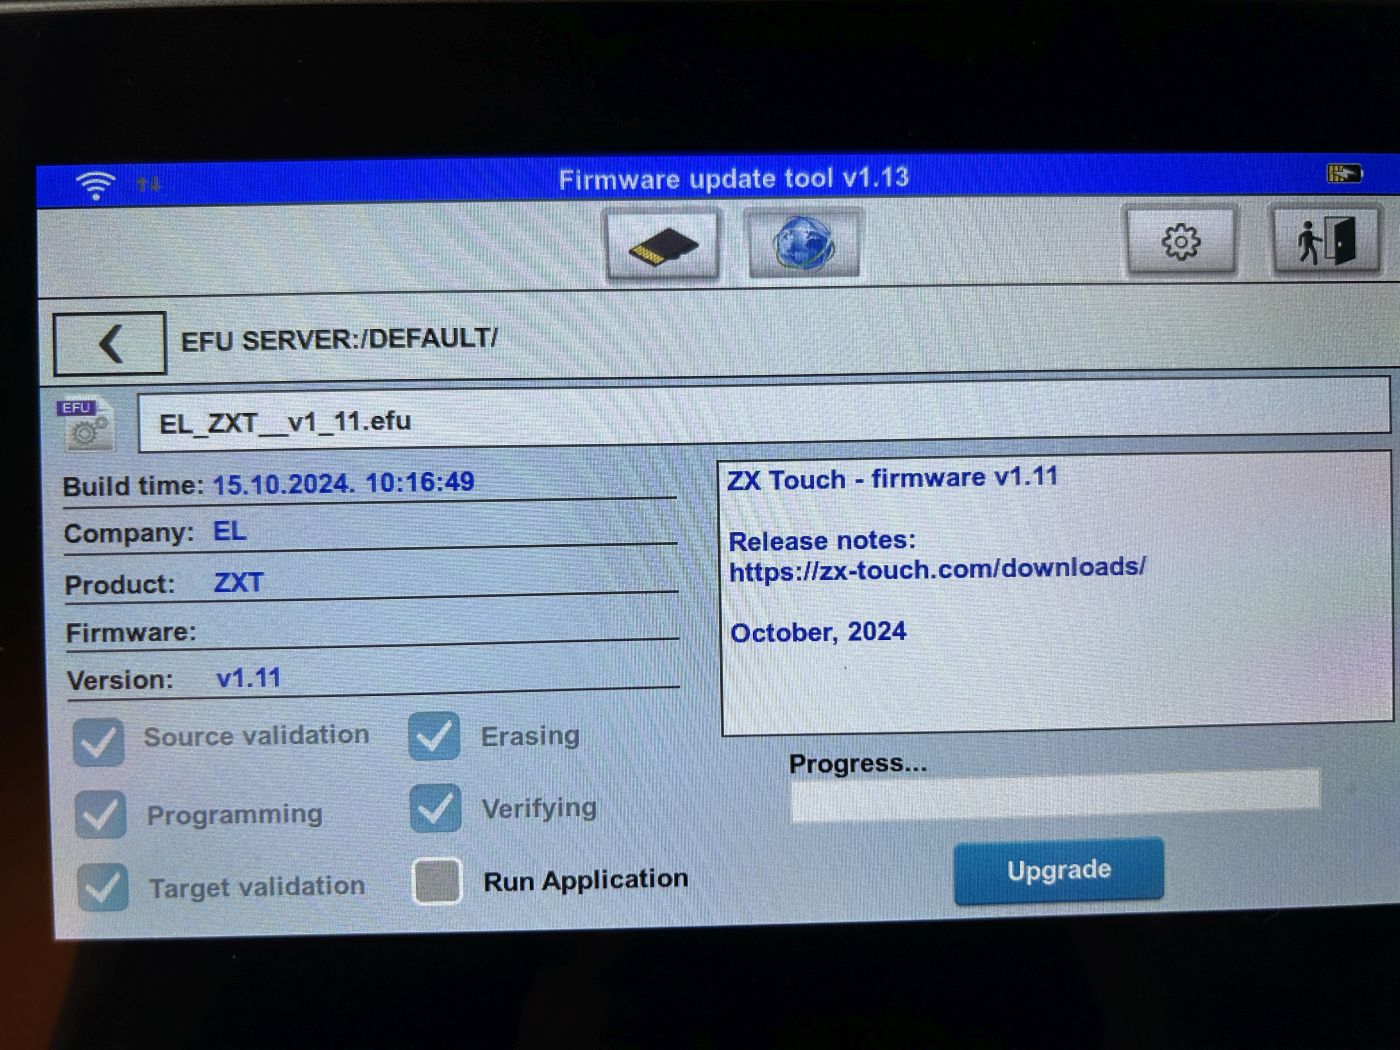
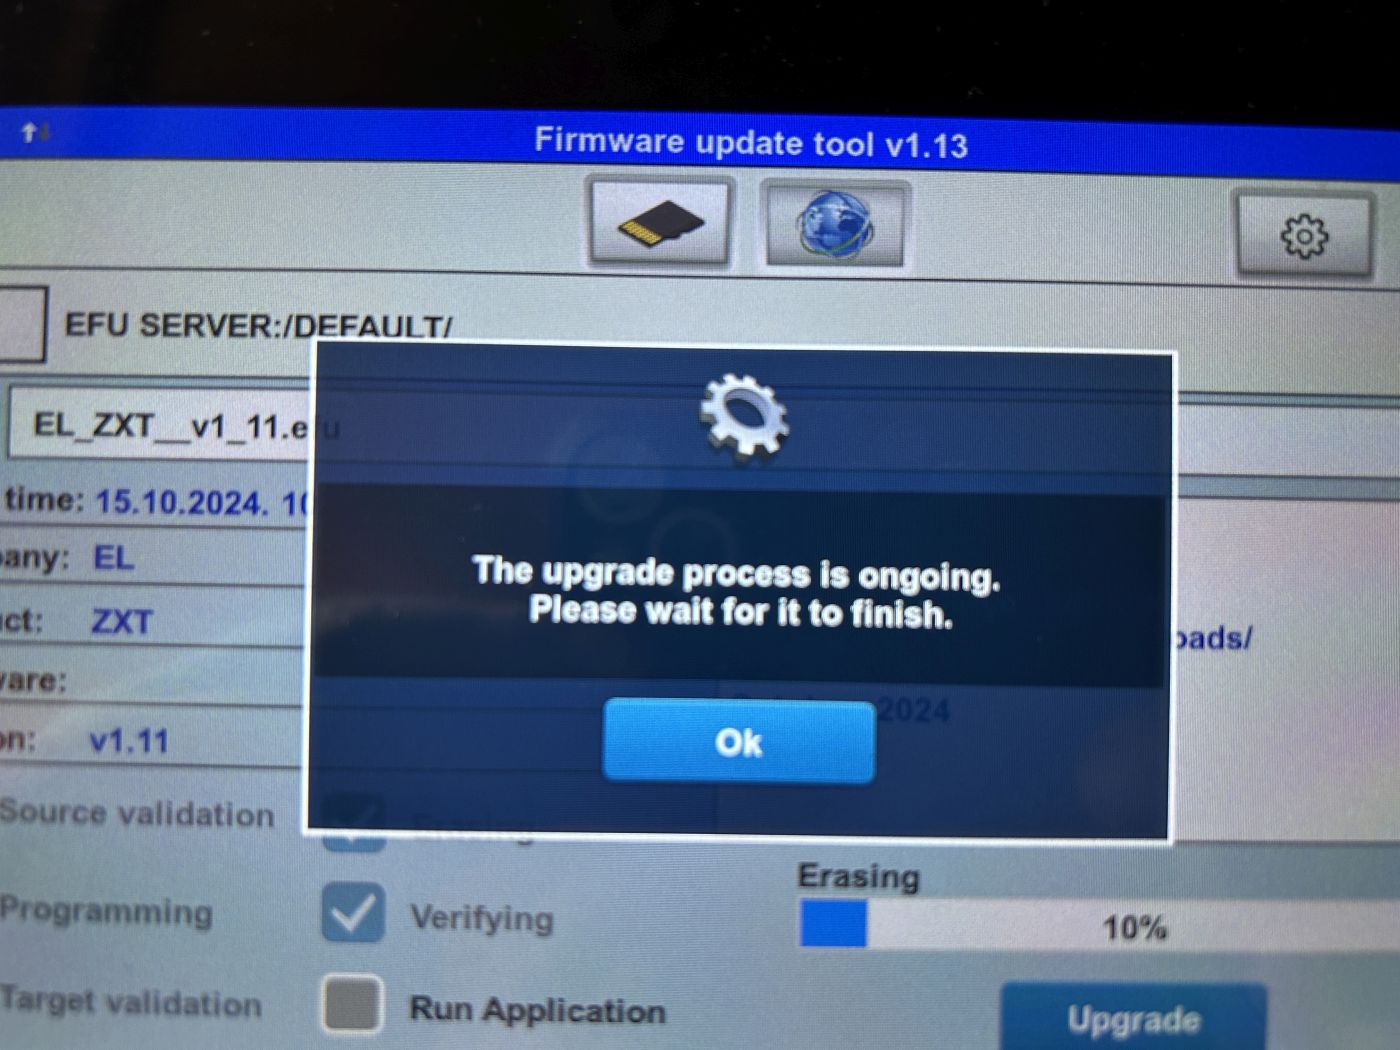
Mein Gerät wurde mit Firmware-Version 1.10 ausgeliefert, doch es gab bereits ein umfangreiches Update auf Version 1.11. Da ab Version 1.10 Updates sowohl per SD-Karte als auch über das Internet installiert werden können, habe ich die Online-Aktualisierung ausprobiert. Dazu das Gerät ausschalten, alle acht Buttons gleichzeitig gedrückt halten und einschalten. Damit wird das Firmware Update Tool gestartet. Mit dem Zahnrad kann die WiFi-Verbindung hergestellt werden. !Es funktionieren nur 2,4 Ghz-Netze – 5 GHz werden nicht unterstütz. Außerdem muss der Akku zu mehr als 50 % aufgeladen sein. Der Vorgang verlief absolut problemlos: WLAN-Verbindung herstellen, das Update herunterladen, installieren und nach einem Neustart war alles abgeschlossen.
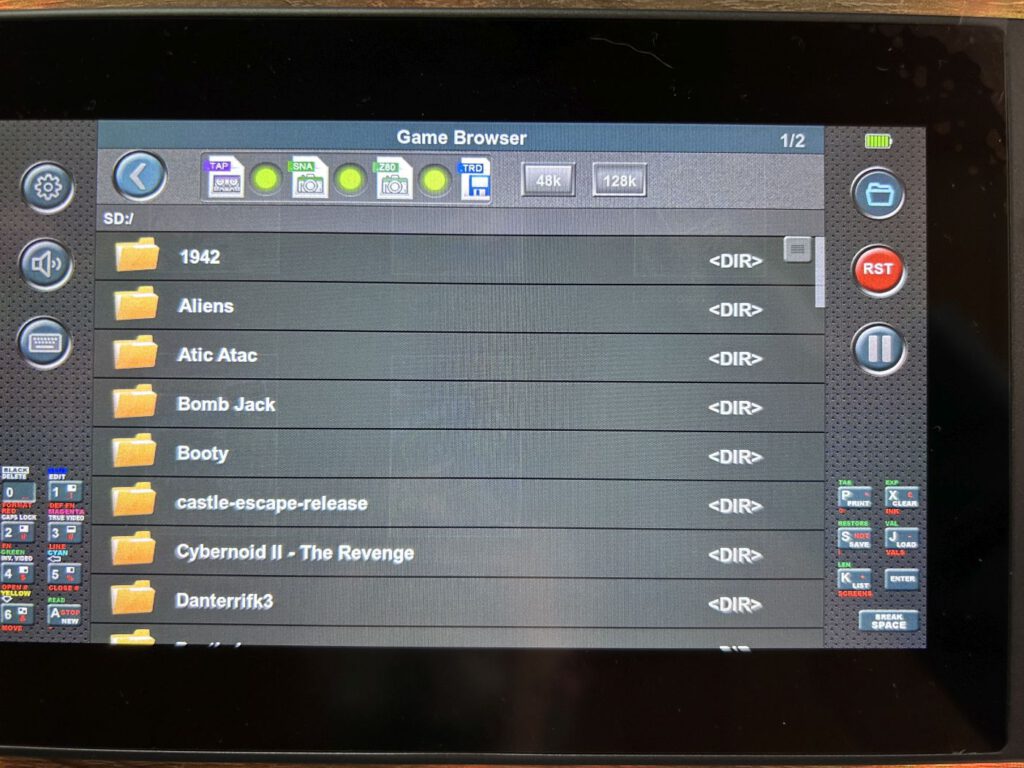
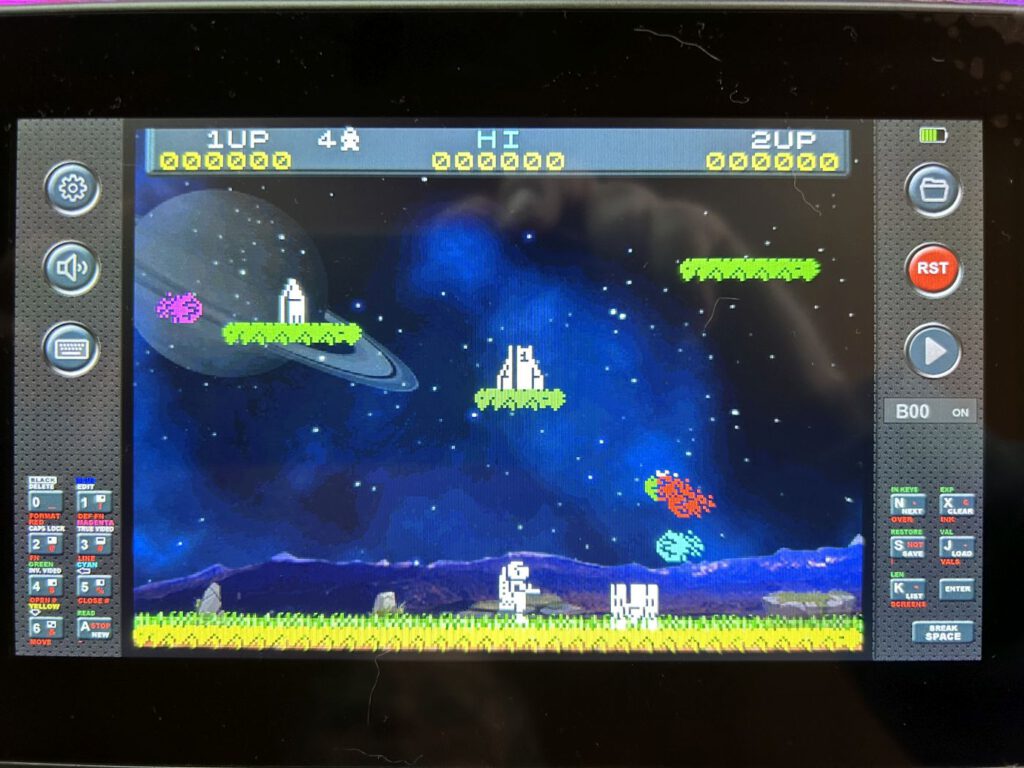
Der ZX Touch wird aktuell mit 40 Spielen ausgeliefert, von denen viele in den letzten Jahren als Homebrews erschienen sind. Eigene Spiele können problemlos hinzugefügt und von der SD-Karte geladen werden, wenn diese mit FAT32 formatiert ist.
As the device does not have an official licence, an alternative ROM has been installed to run games. Should any compatibility issues arise, the original ROMs can be added. These simply need to be copied to the ROMs folder on the SD card – ideally for the 48K and 128K Spectrum, so that larger games can also run. Other computers are not currently emulated.
That brings us to the supported file formats: TAP, SNA, Z80 and TRD – which are more than enough for me. These can be stored directly on the SD card, and a folder structure is, of course, supported.
Loading games from the SD card is just as easy as the rest of the operation. In the dashboard, the first icon – which can be hidden if required – provides access to the external storage device. Navigation is carried out using the joystick, whilst selections are confirmed by tapping the screen.
The screen is flanked on the left and right by icons that offer various functions. Here is a brief overview:
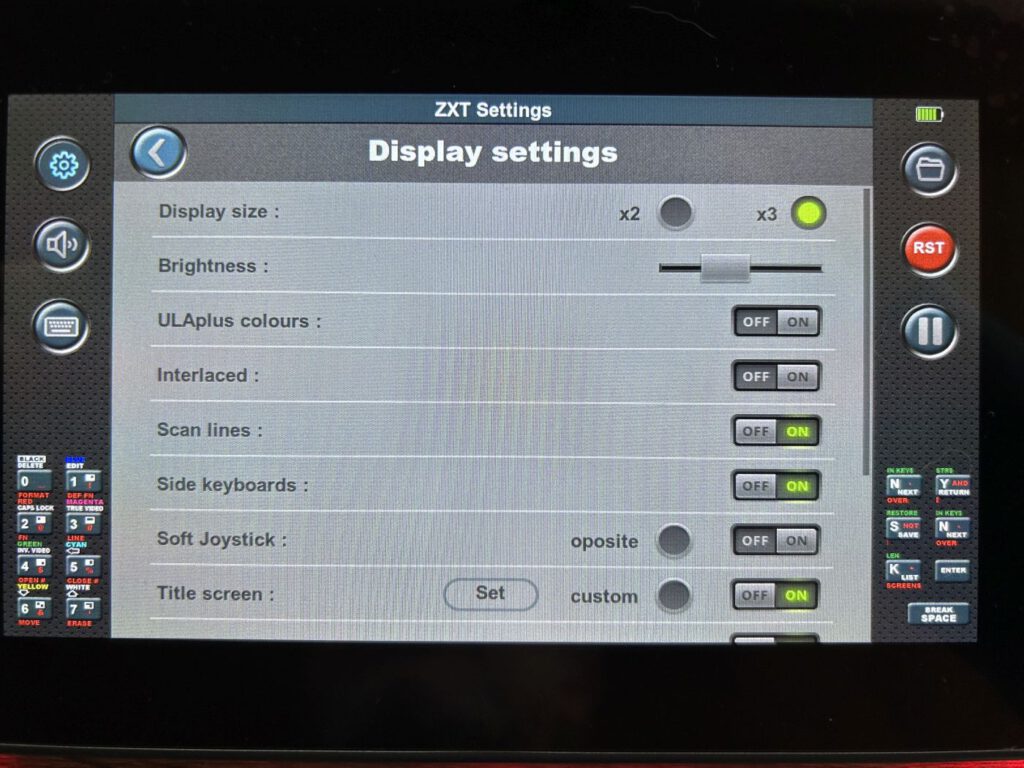
- Settings – Customise the display, sound, button layout, side buttons, joystick, LEDs and various other options; also save and load game saves
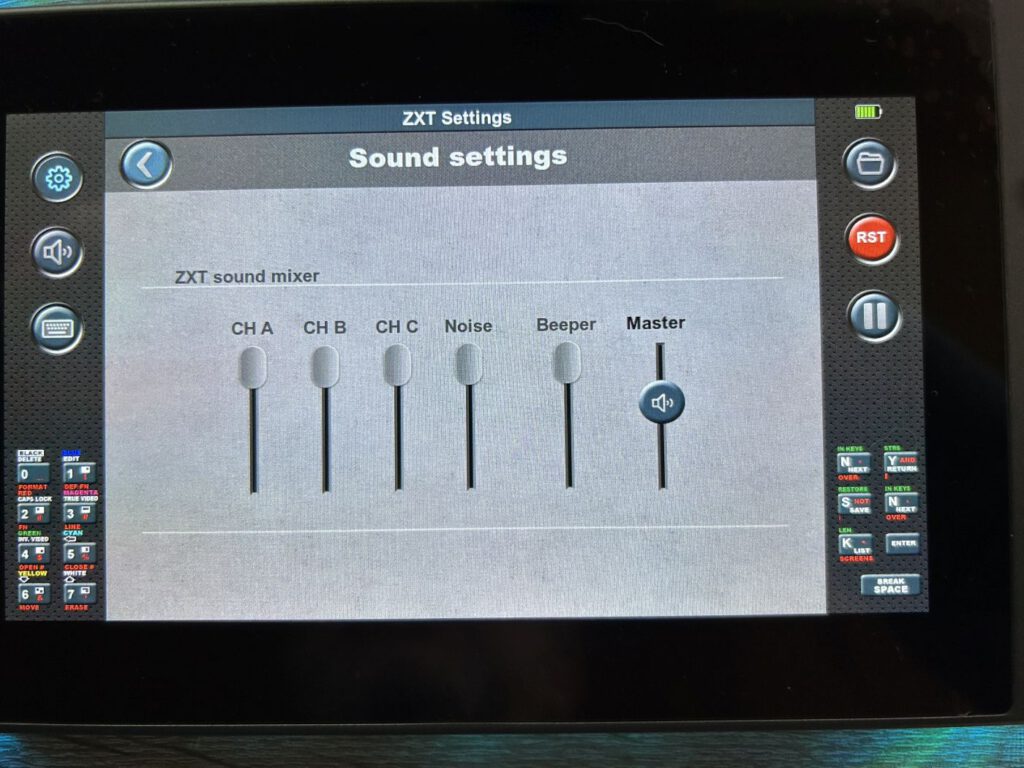
- Sound – Turn the speakers on or off
- On-screen keyboard – Show virtual keyboard
- BASIC mode – Switch to classic BASIC mode
- Reset – Reset device
- Pause – Pause the current game or application
There are also buttons at the bottom of both sides that can be programmed as required.

Dashboard
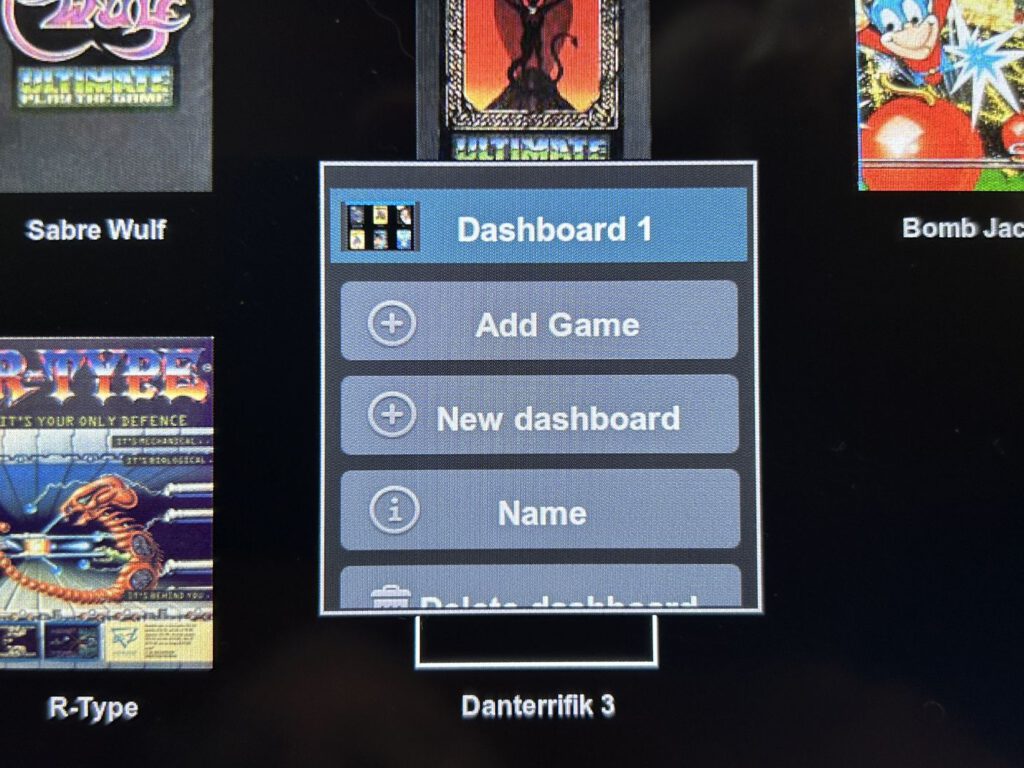
If you wish to create your own dashboards, this is easily done. Press and hold the screen to open a menu with various functions:
- Add game – more on this later
- Create a new dashboard
- Change the name of the current dashboard
- Delete dashboard – only possible if it is empty (best done directly on the SD card)
- Move the dashboard to the left or right – the first dashboard you create can only be moved to the right
- Hide first icon
Add games to the library
Once you have created your own dashboard, you can add your first game. To do this, open the Games Library via the Add Game option – though it will be empty at first! Games must first be added to the library before they appear there.
Navigating through the SD card allows you to select a game. Pressing and holding the game briefly opens a menu with several options: copy, cut, rename, delete – and the most important function: Add to Library.
This option offers a wide range of configuration options for each game:
- Display in the dashboard:
You can use either an automatically generated screenshot or an image file (144 × 208 pixels). The image file must be named as follows:T_filename game.jpg - Memory and ROM settings:
You can choose between 48K and 128K mode to ensure the correct ROM is used. - Integration into a .ZTG file:
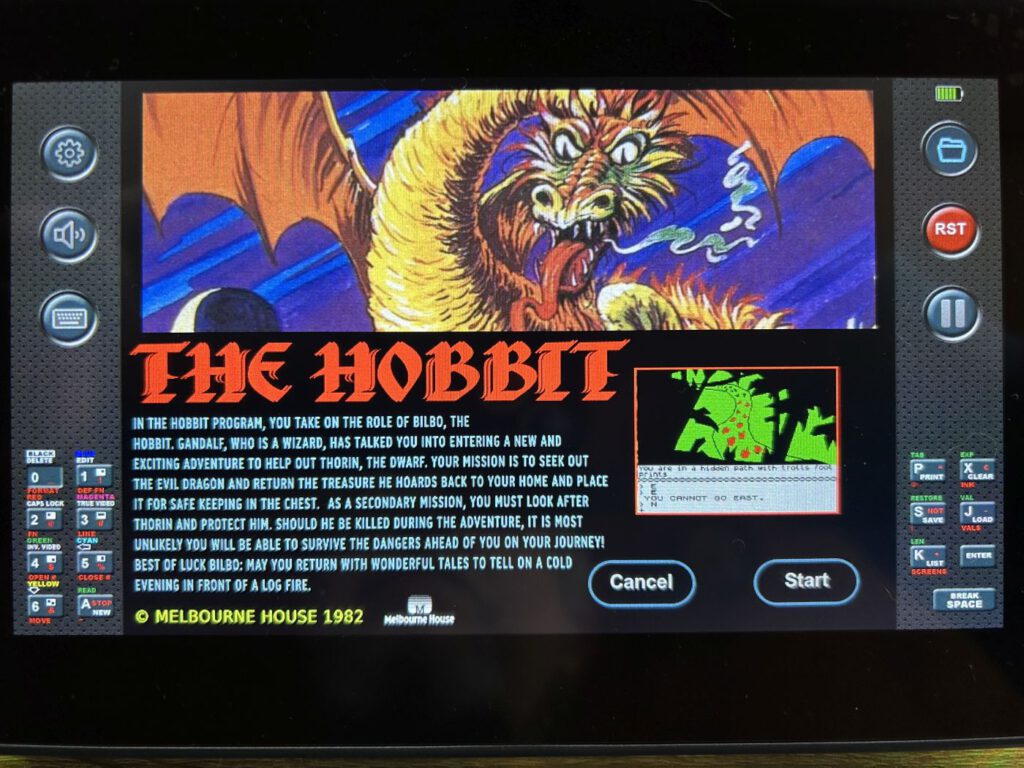
If the game is available in .TAP format, it can be integrated into a .ZTG file generated from the settings. - Information screen before the game starts:
When a game is launched, a brief information screen appears before the game itself loads. This can be replaced with an image file (796 × 600 pixels):I_File name Game.jpg - Game description:
An additional .TXT file can be included as a description or set of instructions:I_filename game.txt - Custom background for the game:
For games without a custom background (e.g. Jet Pac), a custom background can be used:Bxx_filename_game.jpg(796 × 600 pixels, divisible by four) - Cheat function using .POK files:
Using .POK files, you can activate cheats such as infinite lives or ammunition:Filename: Spiel.pok
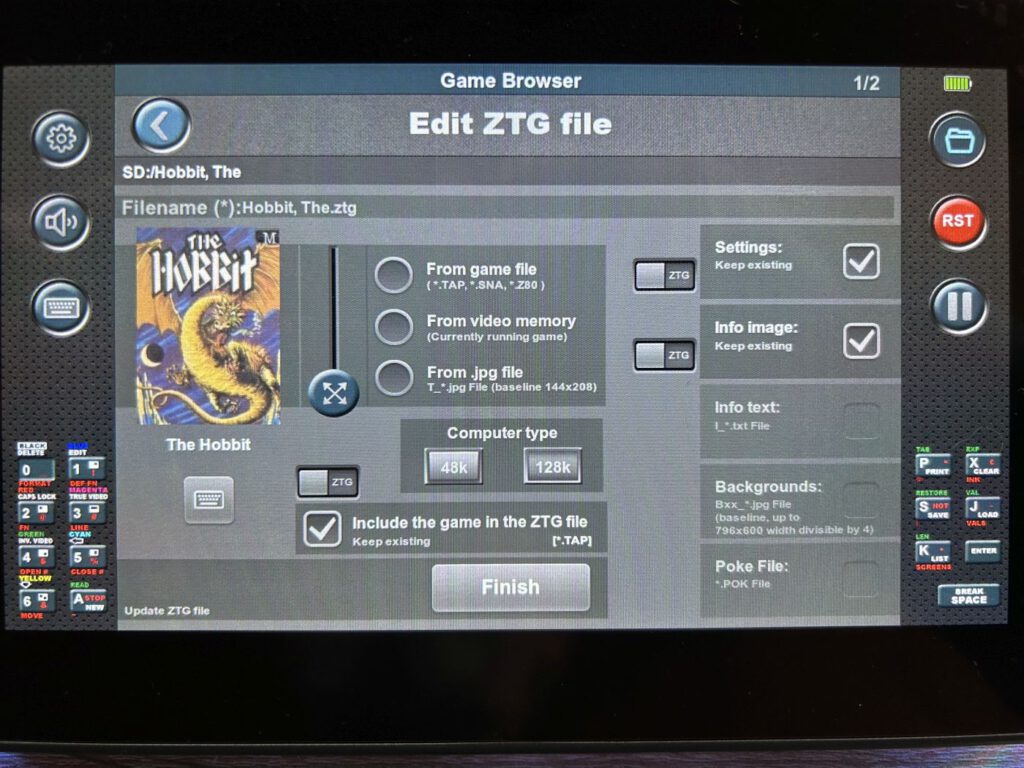
Completion of the configuration
Once configured, click FINISH to complete the process and create the ZTG file. The game should now be added to the library automatically – however, this is not currently working. You will therefore need to add the .ZTG file manually to the library before the game can be added to the desired dashboard.
The easiest way to edit the library’s contents is on a PC. The SD card contains the following folder: ZX_SYSTEM/LIBRARY
Games stored in this folder can be easily deleted.
There is also the following folder:ZX_SYSTEM/DASHBOARDS
I haven’t tested whether deleting this folder causes the entire dashboard to disappear. As only empty dashboards can be deleted, it would be advisable to remove all games directly from the device first.
Here is the revised version with a clearer structure and improved wording:
Custom game settings
Additional custom settings can be configured for each game. The following options are available:
- Display: Adjustment of screen size, brightness, ULAplus, interlacing, scanlines, side screen buttons, keyboard for adventure games, colour palette, background images for games, and the option to hide the side bars.
- Volume: Adjust the volume.
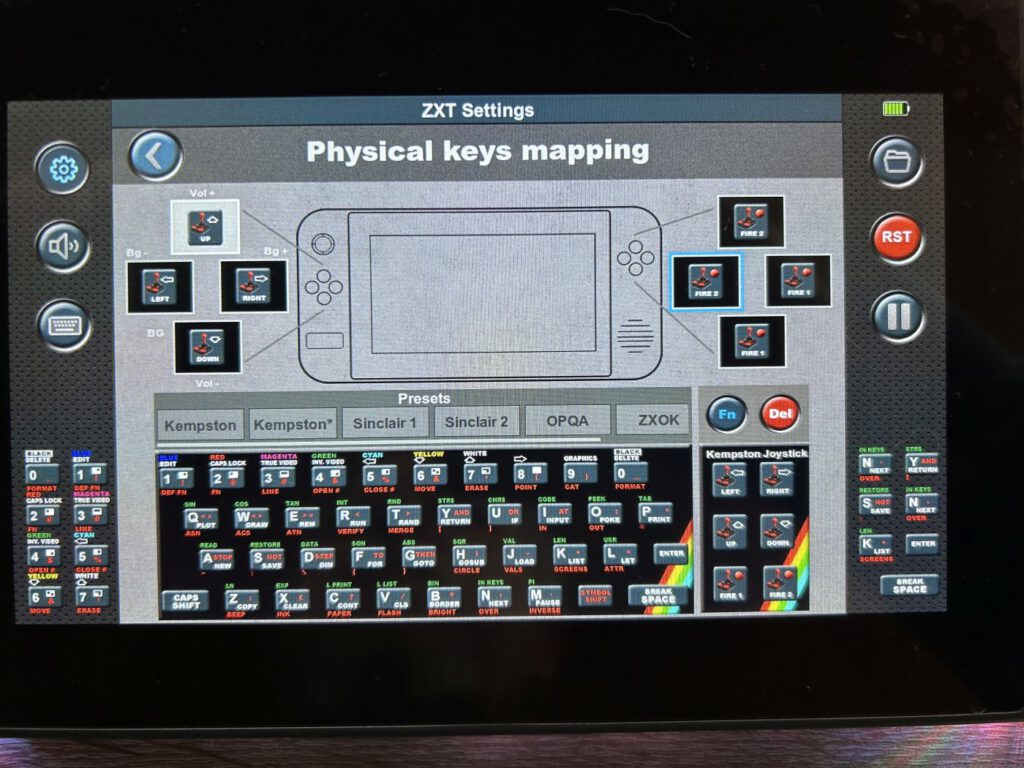
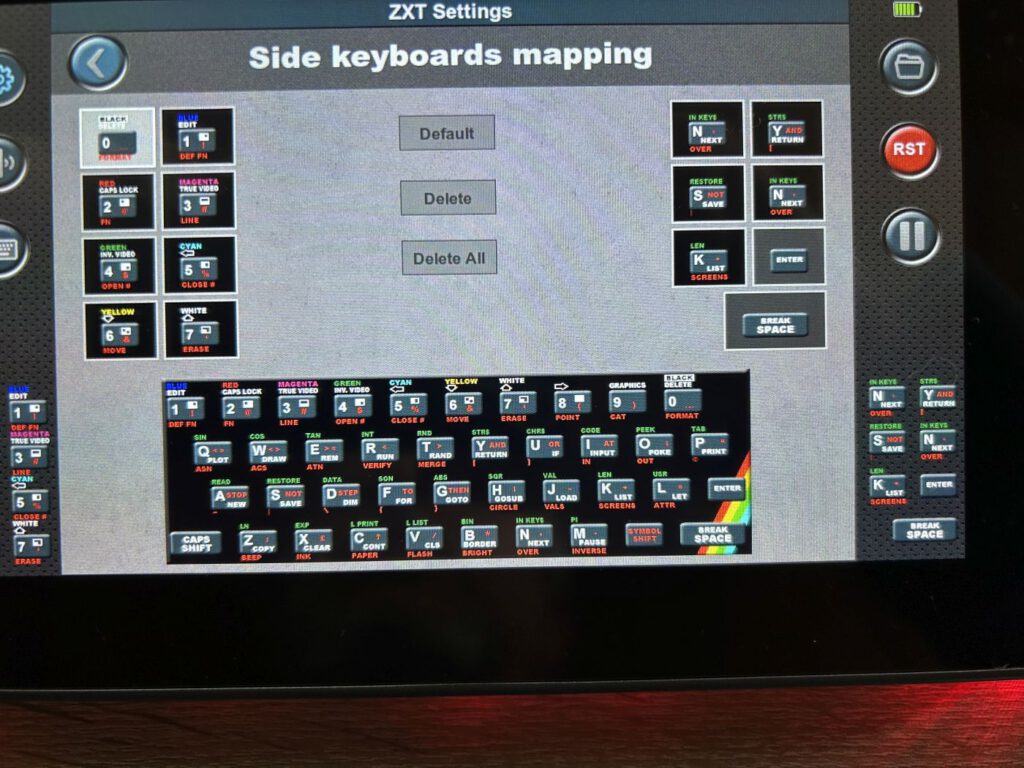
- Key mapping: Custom configuration of the eight main keys.
- Side screen buttons: Example: For Bomb Jack, the “P” key is required to activate the Kempston joystick – so one of the side buttons can be remapped to “P”.
- Analogue stick settings: Adjusting the joystick function.
- LEDs: Configuring lighting effects.
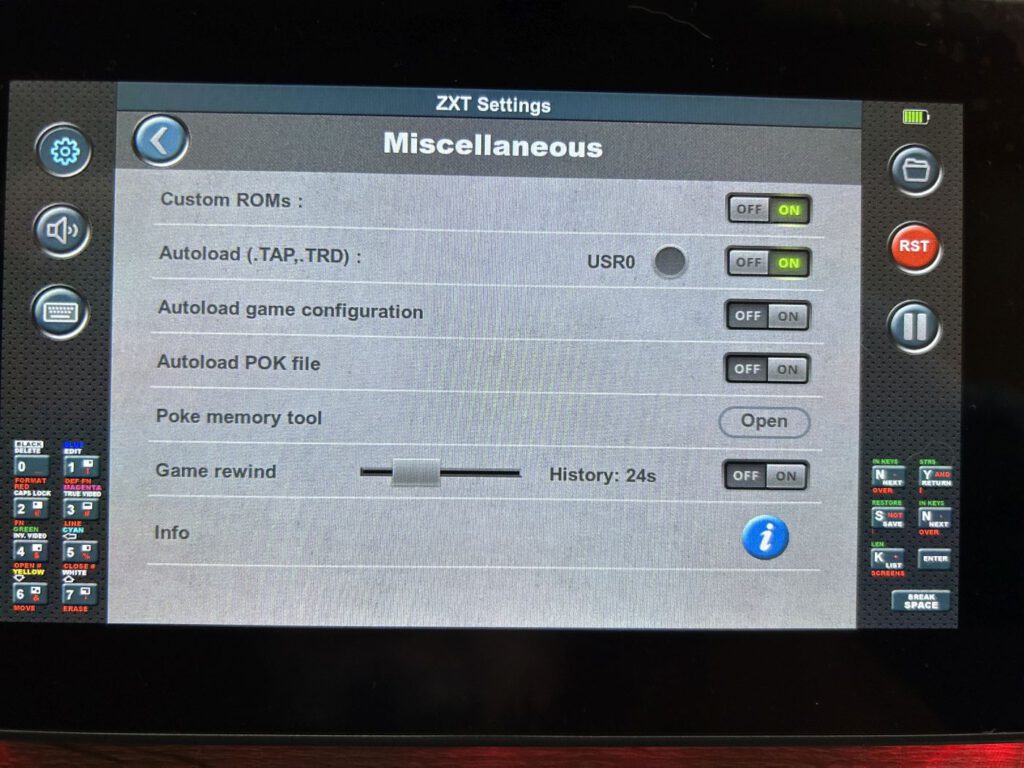
- Miscellaneous: ROM activation, autoload function for .TAP and .TRD files.
- Automatic settings: Automatically saves and loads the appropriate configurations for each game.
- Cheat function: Automatic loading of .POK files for cheats.
- Save and Load: Allows you to save different game settings and load them again later.
This means that each game can be saved with its own settings and automatically restored at any time.
Wallpapers
Older games often only feature a black background. To enhance the visual appearance, you can add your own background images. These should be named as follows:
Bxx_filename Game.jpg (796 × 600 pixels, divisible by four).
If there are several backgrounds available for a game (B00, B01, etc.), you can switch between them. To do this, you must enable the display option in the Display settings and assign one of the eight keys to FN. During gameplay, you can then switch between the different background images using FN + Left/Right.
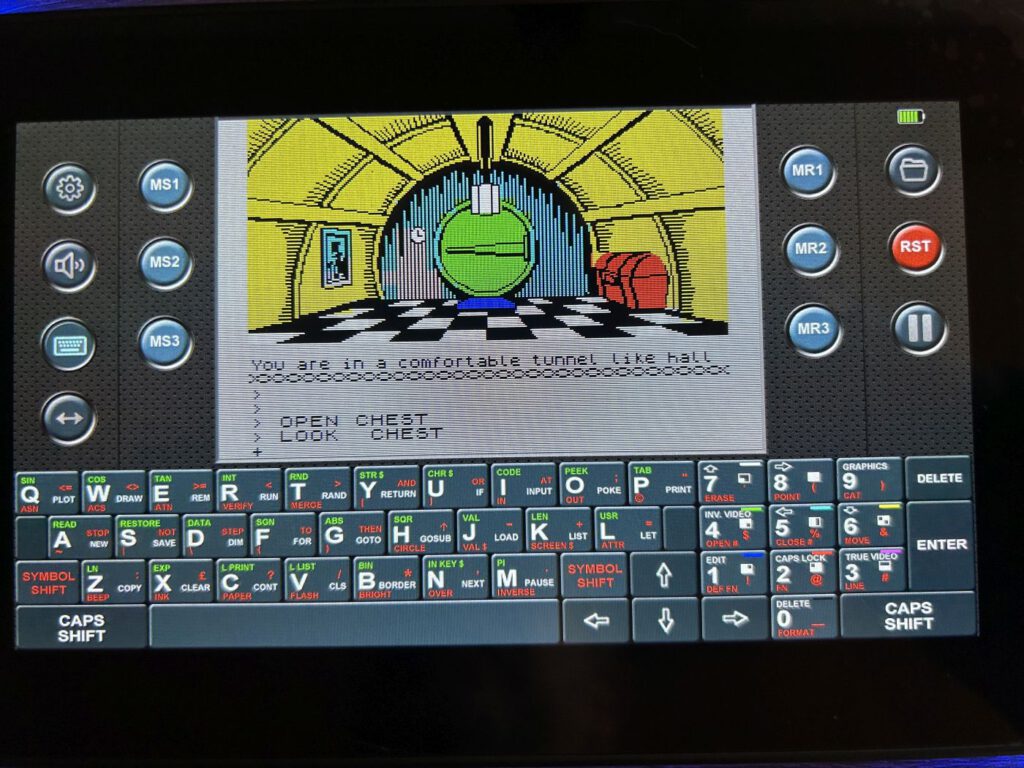
Save and load function
During the game, three save slots are available. Tapping the keyboard icon displays the save options MS1 – MS3 on the left and the load options MR1 – MR3 on the right:
- MS (Memory Save) – Saves your current game progress.
- MR (Memory Restore) – Loads a previously saved game.
These save files are retained even after the device is restarted and can be loaded at any time.
Rewind the game
You can enable the Game Rewind feature in the game settings. This allows you to rewind the game by up to 62 seconds.
By pressing the Pause button during gameplay, you can then use the joystick to fast-forward or rewind – much like on an old video recorder. Once you reach the desired point, you can resume the game from there.
Add information text to games
For each game, an info file can be added containing additional information, such as a brief history from Wikipedia.
If such a text file exists, an additional Story button will appear when the game is launched from the dashboard, alongside the Cancel and Start buttons.
Format of the information file
The file must be in .TXT format and structured as follows:
Example of a file:
Jet Pac – A classic from the 80s
Jet Pac is an arcade action game developed by Ultimate Play The Game in 1983. The player controls an astronaut who must assemble a spaceship and refuel it whilst dodging enemy aliens.
The file must be named according to the game:
I_File_name_Game.txt
Changes to the information files
If an info file is subsequently modified, you must ensure in the editor that the switch is changed from “ZTG” to “EXT” so that the change is applied.
This rule also applies to all other supplementary files, such as:
- Configuration files
- Information images (I_filename game.jpg)
- Wallpapers (Bxx_filename game.jpg)
- POK files for cheats
Conclusion
The ZX Touch isn’t a cheap device and might seem off-putting at first glance. But once you hold it in your hands, you quickly realise what fantastic hardware has been developed here. You can tell straight away that a true Sinclair fan was behind it and put a lot of thought into it.
Although using the dashboards does require a bit of getting used to, the community provides valuable support. The Facebook group in particular already has a wealth of resources available to help you get started.
As far as I’m concerned, the ZX Touch is one of the best investments in the Sinclair world for a long time.
Links
ZX Touch | Facebook
ZX Touch Homepage
Sintech Shop
Suggestions for improvement
– Navigation using buttons
– Currently, a new game is not automatically added to the Library once the settings have been finalised.
– Scrolling through the Library page by page
– Library overview on the ZX Touch
– TXT files cannot contain the characters ö or Ä
– Filter in the file browser – how does it work?
![ZX Touch – Firmware 1.12a [ZX Touch]](https://www.jungsi.de/blog/wp-content/uploads/ZX-Touch-Verpackung-Oberseite.jpg)