

![XU1541 [Commodore 64]](https://www.jungsi.de/blog/wp-content/uploads/XU1541-schraeg.jpg)
XU1541 on a Windows 11 PC: Backing up Commodore floppy disks with OpenCBM (including the pitfalls I typically encounter)
The XU1541 is one of those pieces of hardware that’s easy to underestimate – until you find yourself holding an old 5.25-inch floppy disk again and realise: now would really be a good time to finally back up the data. That’s exactly why the XU1541 has been in my collection for quite some time. It connects a genuine Commodore floppy drive (1541/1571/1581) to a modern PC via USB using the IEC bus. This allows me to back up floppy contents, restore images or simply transfer files. And above all: I can rescue floppy disks before they finally give up the ghost.
Context and a brief history
In the past, connecting to a PC often involved using a cable from the X1541 family – in other words, parallel port solutions. Depending on the PC, chipset and operating system, this would sometimes work brilliantly – or not at all. By the time physical parallel ports had disappeared from modern hardware, the matter was settled as far as I was concerned.
The XU1541 is the USB solution to this problem: USB on the PC, IEC on the drive. Later, more advanced versions such as the XUM1541 and ZoomFloppy were introduced, offering additional features depending on the intended use. For everyday use (floppy disk ↔ D64, reading directories, copying files), however, the XU1541 is exactly what I need.
What I do with the XU1541 (and what I don’t)
Typical tasks I handle:
- Backing up floppy disks as D64 files
- Writing D64 images to real floppy disks
- View directory, check status, copy files
What you shouldn’t realistically expect:
- Specialised archiving at the nibble level and unusual copy protection scenarios (this is a topic in its own right and depends heavily on the hardware and toolchain)
Requirements: Hardware – a quick rundown
- Floppy drive with its own power supply (the XU1541 is powered via USB, but the floppy drive isn't, of course)
- IEC cable connected correctly
- Drive switched on
- Device number is usually 8 (if changed, adjust accordingly)
OpenCBM is the key in Windows 11
On Windows, practically everything runs via OpenCBM. The package includes the drivers/integration and the most important tools, such as cbmctrl and d64copy. Without OpenCBM, the XU1541 is essentially unusable on Windows.
A Windows 11 setup that has worked reliably for me
amd64 = 64-bit tools (the right approach for me on Windows 11)
amd64= 64-bit tools (the right approach for me on Windows 11)i386= 32-Bit-Tools
And this was precisely one of the most common causes of error messages for me: if you start OpenCBM ‘somehow’ or Windows picks up a different version from the PATH, you get errors like ‘NO PLUGIN DRIVER!’ – because the plugins/DLLs can’t be found or simply the wrong files are being used.
So I simply remember this:
I run OpenCBM commands from the folder where cbmctrl.exe is actually located – in my case:
...\opencbm\amd64\
Start the installation specifically for XU1541: instcbm xu1541
I open Windows Terminal or CMD as an administrator, navigate to the amd64 folder and install the XU1541 plugin specifically:
cd /d C:\temp\opencbm\amd64
instcbm xu1541
Important: When I tried to copy the DLL to C:\Windows\System32\, it initially failed (“FAILED!”). This wasn’t an OpenCBM issue, but rather a lack of administrator rights. The installation only went through successfully once the terminal was actually running “as administrator”.
Check whether the connection is working
After installation, I check:
cbmctrl detect
cbmctrl dir 8
cbmctrl status 8


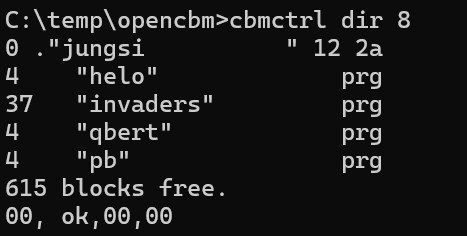
If dir 8 works for you, then the biggest hurdle is out of the way. From there on, it almost gets a bit boring – and that’s exactly how it should be.
Backing up and restoring a floppy disk (Practical guide)
Floppy disk → Backing up to D64:
d64copy 8 meine_diskette.d64
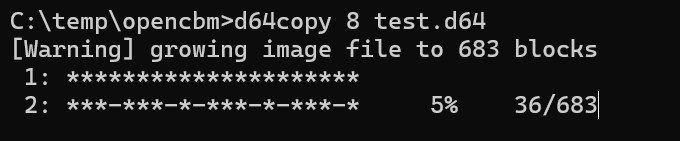
D64 → Write to floppy disk:
d64copy my_diskette.d64 8
I like to check images straight away in the emulator (mount them, browse the directory) before archiving them. Especially with old media, you sometimes only realise on second glance whether everything has actually been read correctly.
CBMXfer / CBM-Transfer on Windows 11: convenient, but with two common pitfalls
If you don’t want to be constantly working with the command line, you’ll soon find yourself using CBMXfer (or ‘CBM-Transfer’). It’s handy – but on Windows 11, I’ve come across two common issues.
comdlg32.ocx is missing (start-up error)
CBMXfer is an older 32-bit tool and requires VB6 components. In my case, comdlg32.ocx was missing. I found the file in the download CBM-Transfer100-setup.zip. I then integrated it as follows:
- Copy file to:
C:\Windows\SysWOW64\comdlg32.ocx - Then register as an administrator (important: use the 32-bit regsvr32 from SysWOW64):
C:\Windows\SysWOW64\regsvr32.exe C:\Windows\SysWOW64\comdlg32.ocx
CBMXfer then launched on my computer without the OCX error message.
In CBMXfer, the OpenCBM path must be correct
CBMXfer ultimately works with the OpenCBM tools. Therefore, in CBMXfer, the path must point to the folder containing cbmctrl.exe. On Windows 11, this is where it is for me:
...\opencbm\amd64\
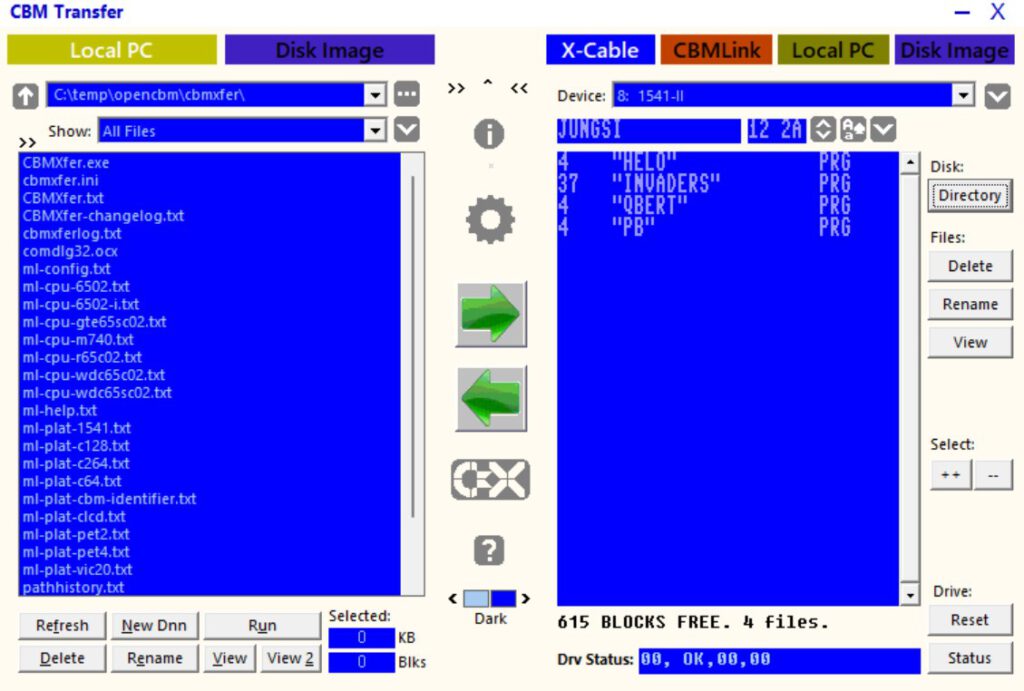
If you accidentally enter the root folder (...\opencbm\) or the 32-bit folder (...\i386\) here, it can quickly appear as though “the drive cannot be found” – even though OpenCBM is actually installed correctly.
Problem → Cause → Solution (from my experience)
NO PLUGIN DRIVER!
Cause: OpenCBM is being launched from the wrong folder (not ...\amd64\) or Windows is launching a different cbmctrl.exe from the PATH.
Solution: Navigate to ...\amd64\ and launch it from there. To check: where cbmctrl.
error: no xum1541 device found
Cause: Incorrect plugin/adapter mode (xum instead of xu) or the driver binding is incorrect.
Solution: Install specifically for XU1541: instcbm xu1541 (as an administrator, from ...\amd64\).
Copying DLL to System32 FAILED
Cause: Installation not performed with administrator rights (or blocked by Windows security).
Solution: Start the terminal as an administrator and run instcbm xu1541 again.
CBMXfer: comdlg32.ocx is missing
Cause: missing 32-bit VB6 component on Windows 11.
Solution: comdlg32.ocx from CBM-Transfer100-setup.zip to C:\Windows\SysWOW64\ and register it using SysWOW64\regsvr32.exe.
CBMXfer cannot find the drive
Cause: Incorrect OpenCBM path in CBMXfer (Root or i386 instead of amd64).
Solution: Set the OpenCBM path in CBMXfer to ...\opencbm\amd64\.
If CBMXfer suddenly stops recognising the drive despite the settings being correct, simply restarting the computer has usually been enough for me to get Windows to properly re-detect the USB driver/adapter.
Conclusion
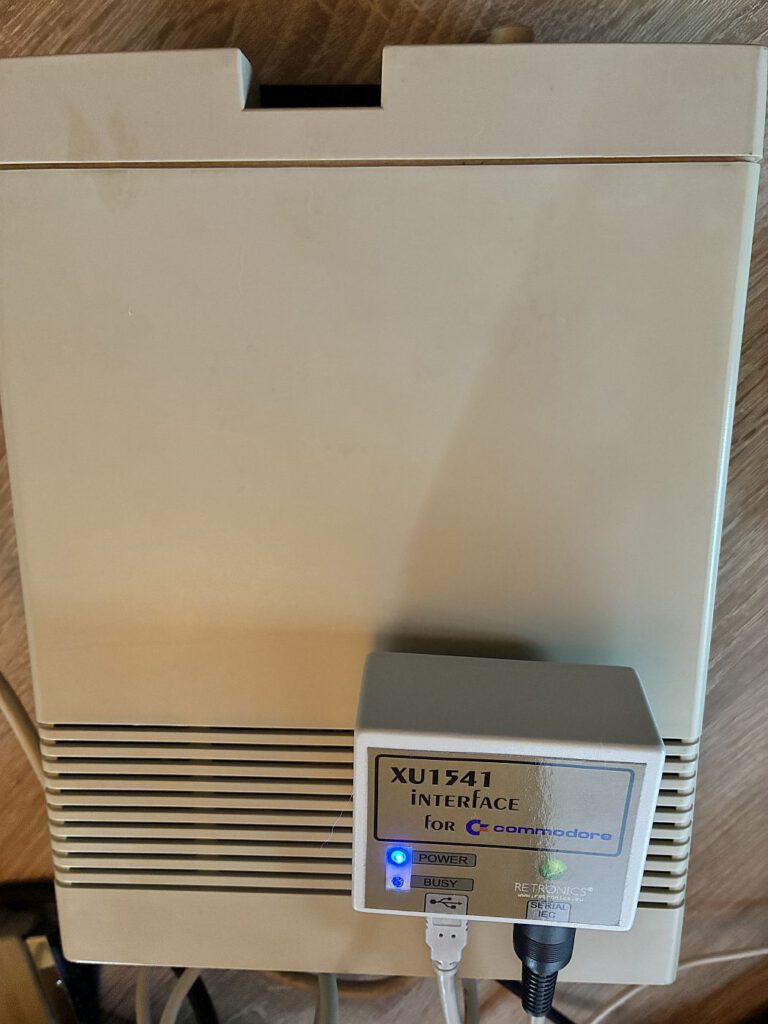
For me, the XU1541 is a reliable bridge between a genuine Commodore floppy drive and a modern Windows 11 PC. Once OpenCBM is properly installed (and you’ve noted the amd64 path), the key functions run with surprising stability: reading directories, backing up D64 files, and writing D64 files back to the drive. And for those who prefer clicking to typing, you can use CBMXfer – though on Windows 11 you should know how to install the missing comdlg32.ocx and set the OpenCBM path correctly.
![UK1541 [Commodore 64]](https://www.jungsi.de/blog/wp-content/uploads/uk1541.jpg)
![Evil Dungeon I + II [Commodore 64]](https://www.jungsi.de/blog/wp-content/uploads/Evil-Dungeon-Ladescreen.png)
![Evil Dungeon III [Commodore 64]](https://www.jungsi.de/blog/wp-content/uploads/Evil-Dungeon-III-Ladebildschirm.jpg)
Leave a Reply