

![WD1770/1772 Interface [Acorn BBC Micro]](https://www.jungsi.de/blog/wp-content/uploads/Floppy-Controller.jpg)
Acorn BBC Micro Model B: Floppy upgrade with 177x_B Issue 1 and WD1772 (including Gotek)
Background
My BBC Micro Model B was in use without a working floppy drive. Typically, many Model B systems would have had an Intel 8271 installed as the floppy controller – but in my computer, there was nothing active that I could simply have carried over. So I effectively started from scratch and wanted to retrofit floppy drive support properly.
This is exactly what the 1770/1772 upgrade is designed for: it replaces or bypasses the original controller logic and instead introduces a controller from the WD177x family, complete with DFS-ROM, into the system. The WD1772 supports double-density operation and, compared to the older WD1770, is the better choice for reliable day-to-day use.
The kit: 177x_B Issue 1 with WD1772 and DFS 2.26
The module used is designated 177x_B Iss 1, fitted with a WD1772 and a ROM containing DFS 2.26. The kit also included two 74LS38 ICs, which are also required for installation.
Tools used:
- screwdriver
- Fine-toothed tweezers
- IC extractor
- Testing device (to check whether S9 is actually disconnected)
Installation: step by step
When installing the module, it is important not only to plug in the controller module, but also to follow all the steps carefully – missing jumpers or unbroken traces will later lead to malfunctions that are difficult to diagnose.
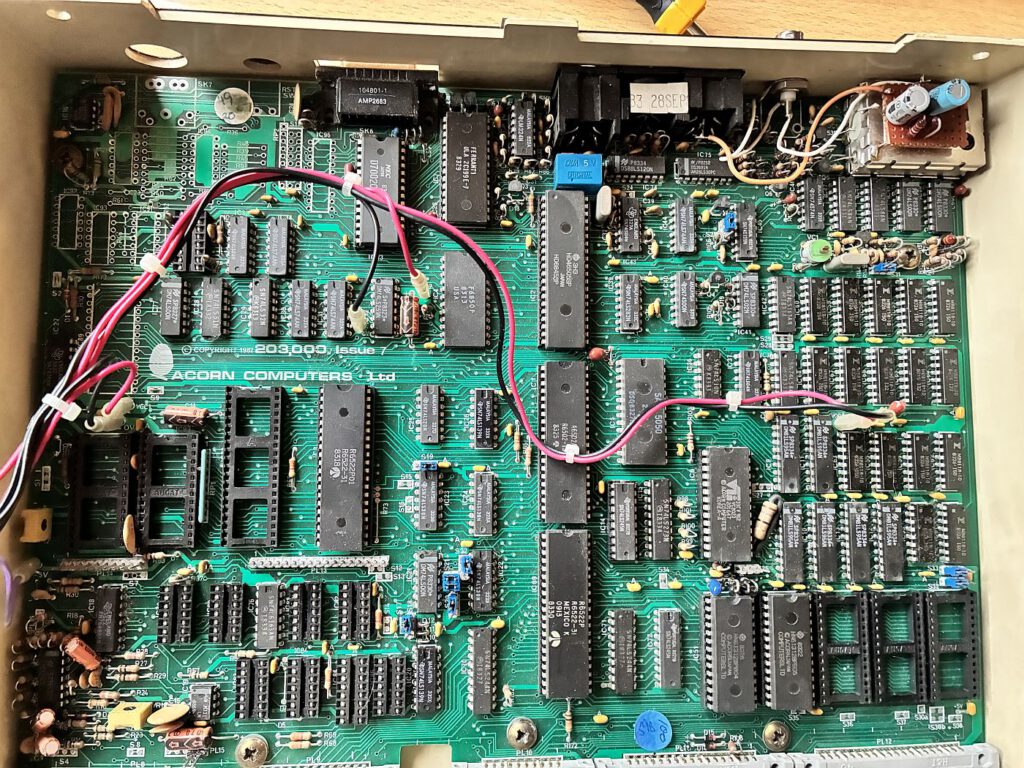
IC79 and IC80: Using two 74LS38 chips
First, insert the two 74LS38 into the designated sockets IC79 and IC80. These logic ICs ensure that the floppy signals are processed correctly. Without them, the system may freeze or behave unpredictably when accessing the drive. When inserting them, ensure that the notch is aligned correctly and that pin 1 is correctly oriented.
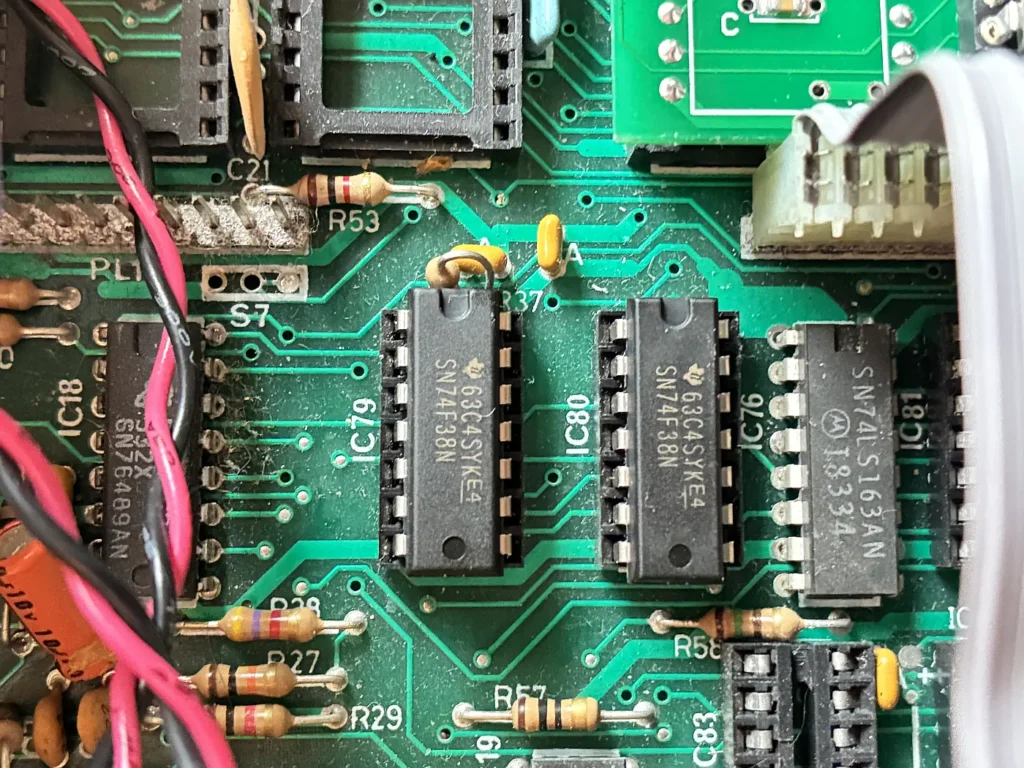
IC86: Building a bridge
An additional jumper must be fitted at IC86. This point is easily overlooked, but is essential for the signal path to function correctly.
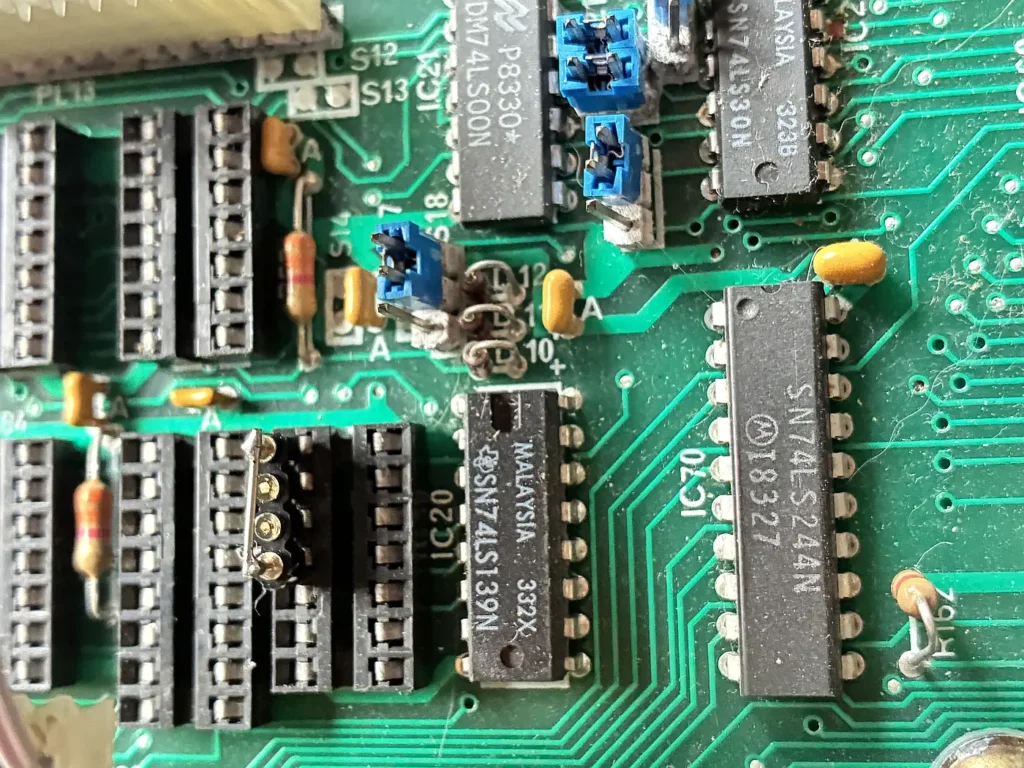
IC78: Installing the 1772 module
The main circuit board, featuring the WD1772, is inserted into the IC78 socket. Only then is the new floppy controller active in the system and can DFS communicate with a drive.
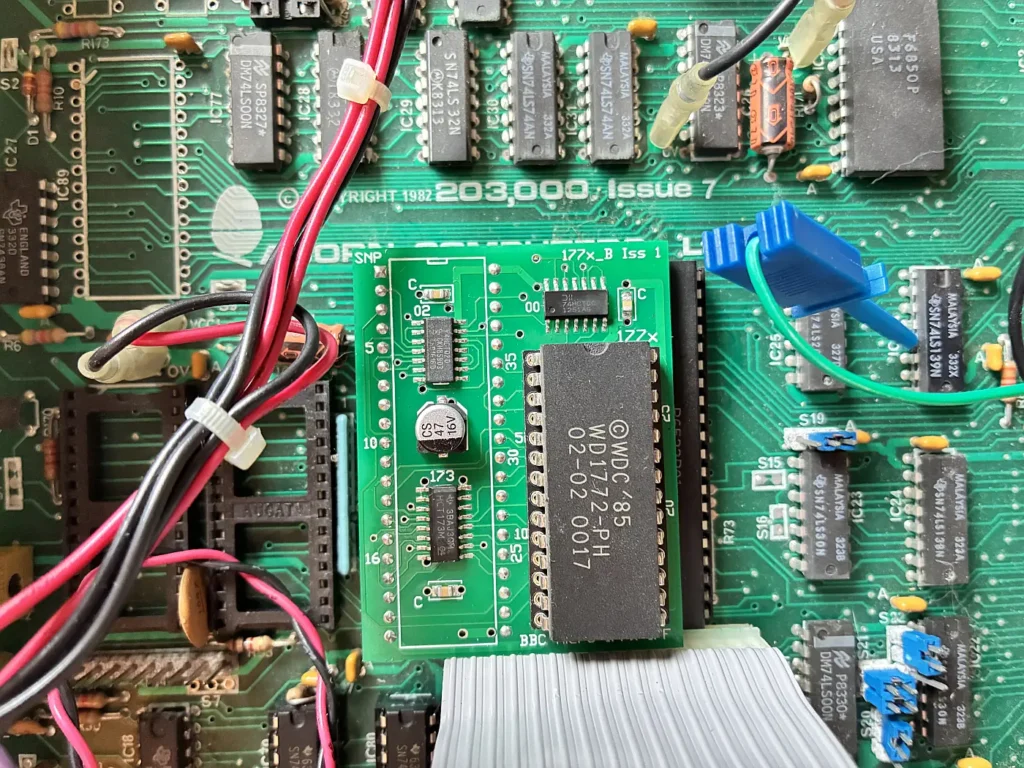
Insert the DFS ROM
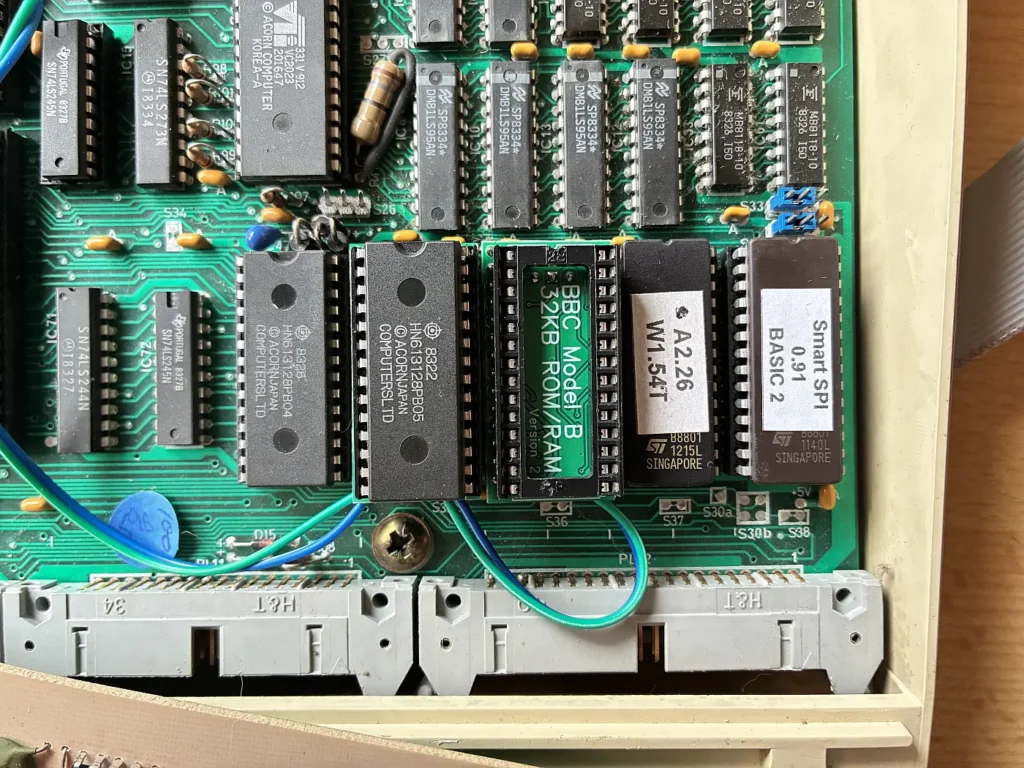
I inserted the DFS ROM into the second-to-last ROM socket on the BBC Micro. I had two options available to me:
- Acorn DFS 2.26 – the official Acorn implementation for the WD177x controller
- Watford DFS W1.54 – a third-party implementation by Watford Electronics
I opted for Acorn DFS 2.26 as I was unaware of the differences compared to the Watford ROM. The most significant difference is that Watford DFS supports up to 62 files per disk instead of the usual 31 with Acorn DFS – though this is achieved through a proprietary, non-standard catalogue format. This means that a floppy disk written with Watford DFS can only be read to a limited extent by a system running Acorn DFS, and in the worst case, the Watford catalogue may be damaged if Acorn DFS overwrites structures it does not recognise. For normal day-to-day use and compatibility with common .SSD and .DSD images, Acorn DFS 2.26 is the simpler and safer choice. Watford Electronics is known, among other things, for supporting 62 files per floppy disk, albeit through a non-standard floppy disk format. Wikipedia
When inserting the ROM, as with all DIP ICs, ensure you note the notch and align pin 1 correctly.
IC87 and S9: The key points
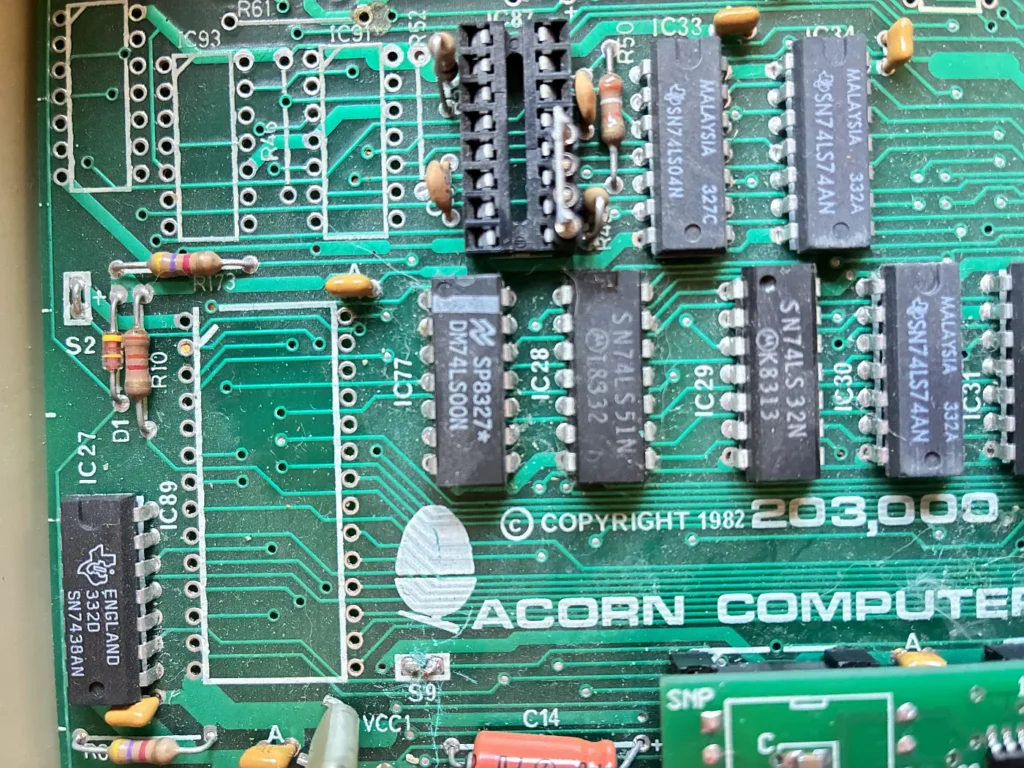
My BBC Micro has an Issue 7 motherboard. IC87 is located at the top left, directly below the unpopulated Econet area. This is exactly where the two points were that had initially been connected incorrectly – and which had caused the computer to simply freeze after *CAT:
1. Jumper on IC87 (pins 9–12)
A jumper must be installed between pins 9 and 12. Without this connection, the controller does not return the expected READY signal after drive access – resulting in a freeze after *CAT.
2. Disconnect S9
The conductor path to S9 must be disconnected. This step is necessary because, otherwise, S9 will keep a signal path from the old 8271 design active and interfere with the new controller. You can then use a multimeter to check whether S9 is actually open – this verification step has proven to be very useful.
Test: First with a real drive, then with Gotek
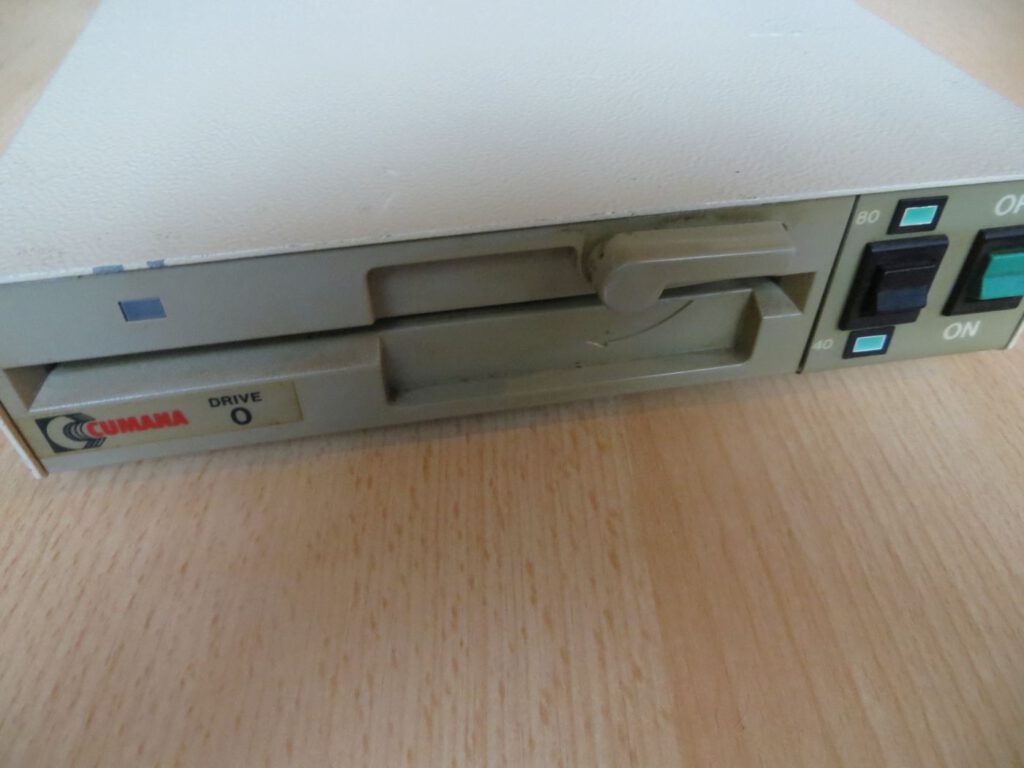
Um Gotek und FlashFloppy als mögliche Fehlerquelle auszuschließen, habe ich nach dem Einbau zunächst mit einem echten Cumana 5¼“-Laufwerk getestet. Als der Zugriff damit stabil funktionierte, stand fest: Das Upgrade ist korrekt eingebaut.
Quick test:
*DISC
*DRIVE 0
*CAT
For double-sided images, add *DRIVE 2 and then *CAT again.
File formats for DFS
DFS uses simple disk images. The standard formats are .SSD (single-sided) and .DSD (double-sided) – both can be copied directly to the Gotek USB stick.
Switching between filing systems
Only one filing system is active at any one time on the BBC Micro. When using floppy disks, you must therefore switch between them manually:
| Command | Function |
|---|---|
*DISC (or *DISK) | Switch to DFS 2.26 |
*TAPE | Switch to cassette mode |
*DISK is simply an alias for *DISC – both forms are valid. If several file system ROMs are installed in the system at the same time (e.g. MMFS and DFS), *DISC may seem unexpected. It is always worth knowing which file system is currently active.
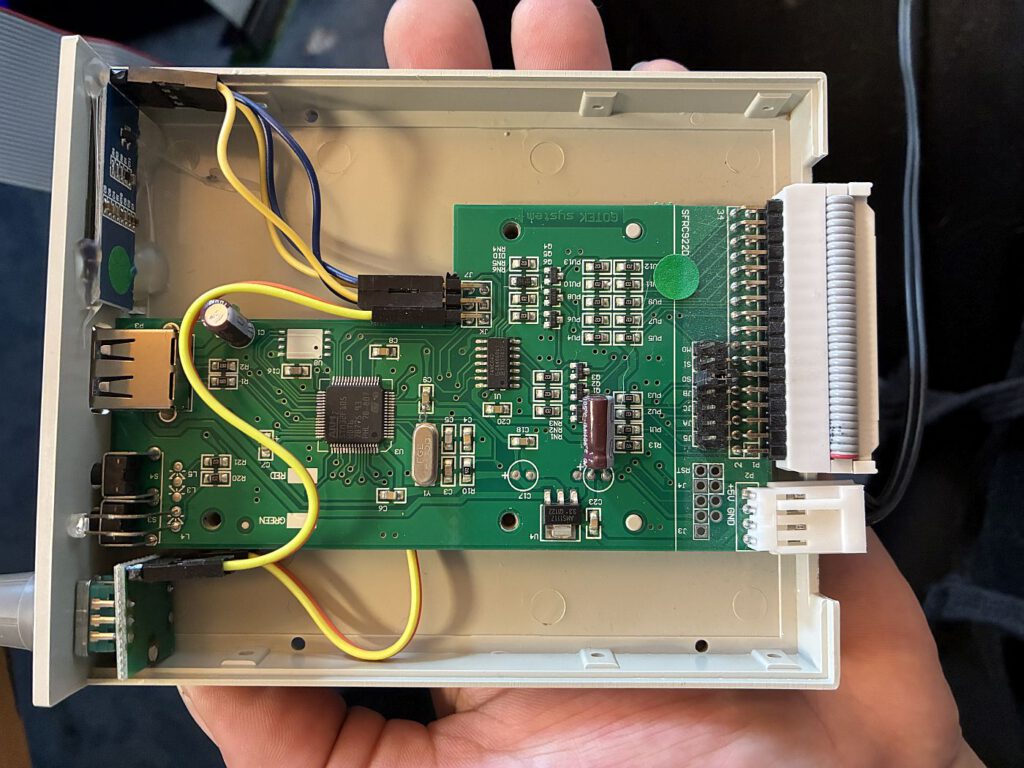
Gotek with FlashFloppy 3.44
I had already been using the Gotek with the BBC Master. I took the opportunity to update the firmware to FlashFloppy 3.44 – which provides a more robust foundation than older versions, particularly when it comes to USB sticks and folder navigation.
DFS: No directories as on a PC
DFS does not use a directory structure like modern systems. Instead, it uses a single-letter prefix – for example, A.PROGRAM or G.GAME. This still allows a floppy disk or an image to be organised in a logical way.
Conclusion
The 177x_B upgrade with WD1772 is a technically fascinating and, in practice, very useful retrofit for the BBC Micro Model B. It is crucial to complete the installation in full – not just to plug in the controller module. In my case, it took several steps, which together made the system stable:
- Install the 74LS38 in IC79 and IC80
- Place a bridge on IC86
- Install the WD1772 module in the IC78
- Set the jumper on IC87 (pins 9–12)
- Disconnect the S9 and check it with a meter
Danach lief der Zugriff stabil – zunächst mit dem Cumana 5¼“-Laufwerk verifiziert, anschließend auch mit dem Gotek.
Appendix: FF.CFG for the Gotek (FlashFloppy)
The following configuration file is designed for the BBC Micro. The two most important entries are interface = shugart and host = acorn – this makes the Gotek behave like a standard Shugart drive when connected to the WD1772.
interface = shugart
host = acorn
pin02 = auto
pin34 = auto
write-protect = no
side-select-glitch-filter = 0
track-change = instant
index-suppression = no
ejected-on-startup = yes
image-on-startup = last
display-probe-ms = 3000
autoselect-file-secs = 0
autoselect-folder-secs = 0
nav-mode = default
nav-loop = yes
twobutton-action = zero
rotary = full
display-type = oled-128x32 -narrow
oled-font = 6x13
display-off-secs = 255
display-on-activity = yes
display-scroll-rate = 200
display-scroll-pause = 2000
nav-scroll-rate = 80
nav-scroll-pause = 300
step-volume = 20
da-report-version = ""
extend-image = no
![Joystick-Adapter [Acorn BBC Micro]](https://www.jungsi.de/blog/wp-content/uploads/Acorn-BBC-to-Atari_C64-Joystick-Adapter.jpg)
![Acorn BBC Micro Modell B [Acorn]](https://www.jungsi.de/blog/wp-content/uploads/Acorn-BBC-Micro-Model-B.jpg)
Leave a Reply